Another short evening, but I'm itching to get back to work on this baby. I got a box of parts in from Smyth Performance recently which included some miscellaneous hardware that I had been missing and also the shifter kit! This will allow me to do gobs more on the project. I was at a halt on a few areas like the wiring harness extension, fuel-cell and battery box assembly, and "plumbing." I didn't want to run all the front-to-rear hoses and wire without having the shifter kit installed as I would then just have to remove it to give myself working space there in the channel.
Anyway, tonight I laid out all my parts to get ready to tackle the shifter kit assembly this weekend. That's the big goal, but I'd really like to finish up the last bit of wiring harness extension also. If time is on my side, and I get really zealous, I'll assemble the front hardware for the fuel cell and battery box, do the cut at the base of the windshield frame (dash trough front area), and install the windshield frame. But let's not set the bar too high just yet. It's been a really long time since I've had the opportunity to put my nose to the grindstone here.
Tonight's work, other than layout and re-familiarization was limited to getting the tie rods removed from my extra power steering assembly, and installing them on the rear subframe. I finally got Evernote installed and synchronized yesterday. Now I can see the latest and greatest notes on everything that's been shared with me so far on the build manual. Mark recommends buying the tie rod parts on ebay, and it's actually not a bad deal. He said $130 or so, but I saw them for $95 w/FREE shipping. I almost bought them anyway, but I have an extra front end or two from my collection of Jetta parts I've been acquiring lately, so I couldn't put some good tie rods to waste. From the pictures, I finally figured out (don't know why I was dense to it before) how to remove the tie rods from the power steering piston rod. Having had a difficult time removing these, let me suggest that if you're also not buying new ones, break the tie rods free before removing the power steering assembly from the K-frame. Having it bolted onto something or in a vise is the way to go with this. It was pretty simple to do as far as complexity, but it was difficult in a few time-eating ways. I don't know if you're reading this, Smyth Performance, but I'm going to make a small beta-suggestion on the subframe. Where the tie rod bolts to the powder-coated frame, the hole was almost perfectly sized, but a tad tight. I had to run a tap through it to get the tie rod stud to pass through. Maybe on some future frames, have it reamed out a couple thousandths (or laser cut a smidge bigger). Not a big deal, just some feedback that may help someone out later on.
I decided to call it quits early so I could blog and get to bed. It feels good to get back to work out there. This last weekend I had wanted to get some things done on the G3F, but over the winter, my garage shrank, and spring cleaning was obviously necessary. Now I have tons of room to work. Fabulous!
"Building in Style"
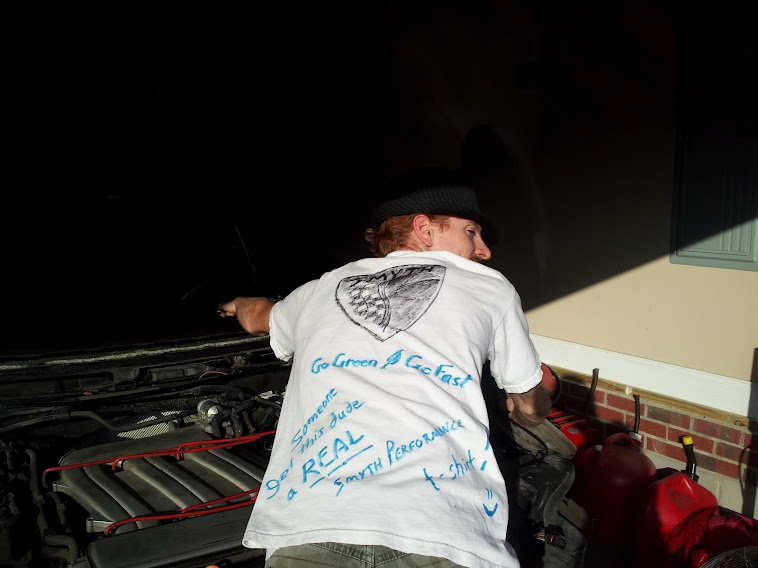
Donations for the REAL Smyth shirt are accepted lol
Wednesday, March 20, 2013

Wednesday, September 19, 2012
Day 19 ~ Rolling Chassis

Due to the work I need to do to sell my Firebird, I'd like the jacks back. So today I set out to remove the outer CV joints from my old spare set of half shafts. It's pretty simple, just super greasy. The only really tricky part is once you've tapped the end off the splines, getting the balls and cages out. If you like those metal puzzles in Cracker Barrel, then you'll get them out fine. No matter. I got them both cleaned up and installed in the front hubs. This is important for support of the bearings. Do not ever load weight on the wheels without these in place as damage to the bearing will likely result. Well enough about that. I threw the old wheels on and lowered her down...
 Woohoo! It looks pretty sweet sitting nice and low. Clearance is pretty tight on stock offset to the new struts. Looks pretty good now, but I'll be getting the aftermarket wheels on eventually anyway.
Well, a short night relatively, but some progress, answers from Mark, and preparation for several other big things going on around here this weekend means I'm plenty satisfied with today's work. Peace out!
Tuesday, September 11, 2012
Day 18 ~ Rear K frame & suspension
Almost have a rolling frame! In fact I almost went ahead and bolted the wheels on just for fun to get the G3F off the jacks tonight, but in lieu of needing to hook up the rear calipers, rotors, brake lines, and tie rods, I figured it would just waste time for an appearance. The tie rods that are stock have ball ends in the power steering boots and threaded portions (14mm) at the outside ends. I unscrewed the rods to remove the power steering assembly (4 bolts) from the K frame.
Taking up the most time tonight was the strut assemblies' replacements. You would think with all the practice that this would have been easy by now. Not really. Even after replacing the front suspension in my TDI this week, I still had plenty of difficulty getting those spindles loose. There's a tool on ebay ($19.99 free shipping: search "vw suspension tool"), and a set on amazon ($60ish) that looks like a socket with a flat tip screwdriver bit in the end. They're not really expensive, so I highly recommend purchasing one to do the spreading for you. I also had to burn time filing both of the bottoms of the new struts at the welds. So that's 3 of 4 that wouldn't fit down the spread tube without filing the welds that left a lip just wider than the tube. Maybe I can get Mark to make a quality assurance call to the manufacturer he's getting these from. The welds are nicely done. It's just the really tight tolerances don't leave much margin for any excess material.
NOTE: There is a difference between the TDI and the VR6 spindle where it clamps the bottom of the strut. The VR6 is basically one solid cylinder vs. the TDI which looks the same from the outside, but has two 1/2" bands that contact the strut. I found the VR6 to be much tighter and more of a pain to spread adequately.
I have a bit of work to do getting the brakes looking nice and being functional, but my biggest hold-up for now on the rear spindles is the tie rod modification. In case you're wondering how we get away with a front (turnable) suspension on the rear, Mark made a place to bolt the tie rods into the tubular subframe to lock the wheels in place and also give a toe adjustment for alignment. My only problem is that we don't use the stock tie rods, but I don't have any hardware that substitutes the tie rod. I'll put that on my list of things to request from Smyth Performance tomorrow when I call. No matter, though, I'm sure he has a little goodies list of things to send me soon. We just want to make sure all the kinks are worked out before production hits. The last estimate I heard on that was the end of this month, but I believe that's optimistic by several months. I'd guess high 80's to 90% completion by this month. There's the finished top to consider, VR6 exhaust and manual tweaking, any 1.8T differences in development, and probably a few more things that need to be buttoned up before a full-scale production operation gets underway. In the mean time, that high percentage of finished items can keep any further buyers busy for quite some time, so no worries here. I've been kind of slow getting to things around here because I'm finding parts I don't yet have are "next" in my assembly, and I've had an overwhelming amount of maintenance and other issues coming up lately. As usual, there's still plenty to keep me busy before I run out of things to do. I plan to get the windshield frame, rear brake lines, rotors, and calipers installed, and put the wheels on the ground next. Then I work on swapping the tranny to the replacement motor, and giving that all a good once-over. Once I remount the engine in the back, I can begin plumbing and routing of all the systems and components. Sounds like fun!
Taking up the most time tonight was the strut assemblies' replacements. You would think with all the practice that this would have been easy by now. Not really. Even after replacing the front suspension in my TDI this week, I still had plenty of difficulty getting those spindles loose. There's a tool on ebay ($19.99 free shipping: search "vw suspension tool"), and a set on amazon ($60ish) that looks like a socket with a flat tip screwdriver bit in the end. They're not really expensive, so I highly recommend purchasing one to do the spreading for you. I also had to burn time filing both of the bottoms of the new struts at the welds. So that's 3 of 4 that wouldn't fit down the spread tube without filing the welds that left a lip just wider than the tube. Maybe I can get Mark to make a quality assurance call to the manufacturer he's getting these from. The welds are nicely done. It's just the really tight tolerances don't leave much margin for any excess material.
 |
| See both the tie rod end and the cylinder clamp of the VR6 |
 |
| Using an extra donor mat to keep scratches away as I drag the rear K frame assembly into place ; ) |
 |
| Hoisted K frame up into place. Nice fit! |
Tuesday, September 4, 2012
Day 17 ~ Wiring 2 and Misc.
I put in about 2.5 hrs on wire splicing until I ran out of connectors for the larger gauge wires. I got plenty of the small ones, but only half the larger ones I needed in the shipment. I'll make sure there's an inventory adjustment so you won't have to worry about it when you get your kit. Simple fixes . . . beta = )
After going at it for a long time, I found myself starting to make a couple mistakes, so I took a break from the wiring so as not to mess up something critical. I need some coffee or a Monster energy drink or something to finish up those last couple connector extensions. Still waiting to hear from Mike on a double-check of the VR6 wiring, but I can finish all but the 2-pin connector according to the manual so far. If any other betas working on (or finished with) wiring want to point us in the right direction, what component is the 2-pin extension going to/from? I found 8 identical connectors, of which 3 or 4 could be eliminated, but could use some help figuring out which component I'm running an extension to. We'll get it double checked and clarified in the manual. Other than that, the rest seemed easy to find and extend so far.
The goal is to get the G3F off the jack stands and onto its own wheels, so I spent some time getting the extra K-frame et al ready for installation. I still have to pull the OEM struts, source some calipers, and figure out the tie-rods and half shafts configuration. Then I'll bolt the frame on, hook up the new struts, and put the wheels back on for "rolling frame" status.
Sorry about my long silence, last week was spent heavily in dismantling the spare VR6 I bought for the engine. I got that one completely gutted, kept anything usable, and scrapped the rest. Then I cleaned the engine a bit and pulled off anything that was deteriorated or damaged. I'll be dividing some efforts between electrical extensions, suspension installation, and engine preparation until I get some more parts. After that, I expect to fill up the tunnel with heater hoses, shift cables, and all the rest of the plumbing. Seems simple enough, but I'm learning everything is taking longer than I expected. ;)
After going at it for a long time, I found myself starting to make a couple mistakes, so I took a break from the wiring so as not to mess up something critical. I need some coffee or a Monster energy drink or something to finish up those last couple connector extensions. Still waiting to hear from Mike on a double-check of the VR6 wiring, but I can finish all but the 2-pin connector according to the manual so far. If any other betas working on (or finished with) wiring want to point us in the right direction, what component is the 2-pin extension going to/from? I found 8 identical connectors, of which 3 or 4 could be eliminated, but could use some help figuring out which component I'm running an extension to. We'll get it double checked and clarified in the manual. Other than that, the rest seemed easy to find and extend so far.
The goal is to get the G3F off the jack stands and onto its own wheels, so I spent some time getting the extra K-frame et al ready for installation. I still have to pull the OEM struts, source some calipers, and figure out the tie-rods and half shafts configuration. Then I'll bolt the frame on, hook up the new struts, and put the wheels back on for "rolling frame" status.
Sorry about my long silence, last week was spent heavily in dismantling the spare VR6 I bought for the engine. I got that one completely gutted, kept anything usable, and scrapped the rest. Then I cleaned the engine a bit and pulled off anything that was deteriorated or damaged. I'll be dividing some efforts between electrical extensions, suspension installation, and engine preparation until I get some more parts. After that, I expect to fill up the tunnel with heater hoses, shift cables, and all the rest of the plumbing. Seems simple enough, but I'm learning everything is taking longer than I expected. ;)
Saturday, August 25, 2012
Day 16 ~ Wiring 1
Mark Smith chatted with me yesterday and was able to steer me in some good directions and also confirmed some details with me so he can send me some more goodies. Yeah! I ran into a little different scenario as originally I had planned on using my TDI for the donor, but changed my mind later on when a local shop had a VR6 sitting in the lot collecting dust. The issue is, once you order a kit, Smyth Performance goes through their lists for parts based on the donor you're using. There are several differences between the TDI and VR6 of course, but also between 5 and 6-speed manual tranny's. So after some confirmation and good conversation, Smyth Performance will be sending me some items (like shift cable extension kit & other hardware) soon that will work for my build. I still have enough to keep me busy for a while, but it's nice to think ahead. Apparently there are 12 builds currently taking place. I don't know who they all are, but chime in anytime here if you are a beta with links and info as you see fit. BETA's I know of so far that are building now: John #1 Phillips, Clint "Redjoker" Frysinger, Bill Shaw, Bob #24 Terranova (25 min away), Uwe Lenger, Robert Zeien, Jalen Smith, and I'm pretty sure Mike Gallant's and Kim's VR6 are being worked on too at the HQ.
Not all of today was tied up in wiring. I prepped and painted the windshield frame with Duplicolor's truck bedliner spray as per Mark's recommendation. It really looks good with a little texture to it. Most of it will be covered anyway, but I wanted to seal it so the rust wouldn't be a problem. I ran short of help today, so it will have to wait for another time for a test fit. That's okay as the dash trough has the bus connectors I'm working on anyway. I only got 2 runs of cable done out of an estimated 8 or 9, so I have a long way to go, but I'm getting into a groove. Can't stress enough the necessity of good tools. I picked up a Harbor Freight ratcheting crimper, hoping it would be the stuff. Wrong. I'm having to more than double my work. Conversing with Mike tonight, he gave me a link for a pair like he uses. I'll be ordering one as soon as I start another build. This one will hopefully be done Monday or Tuesday as far as the wiring extensions go.
Underneath the car, I still had some heat shield in the tunnel to remove, disconnect the 2 O2 sensors, and remove the catalytic converter section of the exhaust. I also removed my damaged (rear right) brake line in preparation for its replacement. I spent some time untangling my mess of wiring harness, and gave Mike some feedback for his wiring section of the build manual in progress. I like Mike. He's doing some really good work. He should be in the shop tomorrow to take a look at what I have a question on. Basically I figured out all the connectors that need extension except the 2-pin connector. I have found at least 8 connectors that look like the one pictured. Some are obviously staying up front, but there are still plenty to choose from, so he's going to look and try to tell me which component or trunk line it's on. Meanwhile I will keep working on the others I know.
Friday I was able to tear apart a little more of that spare (wrecked) red VR6 that I got the motor out of. I'm not counting time on that one as part of this build unless it's directly related to something I have to do for this build. Anyway, I'm hoping to recover its brake line, K-frame, spindles, half shafts, tie rods, and a-arms for my current project. The rest of the car and parts will be sold, stored for another G3F, or taken to the scrap yard. Tomorrow I hope to get the front and rear "axle"/frame stuff off to use (I need the rear for a frame that's got no rear wheel assembly, not the G3F).
Nothing new that hasn't already been posted for pics on the wiring project, but I will snap a shot or two of the windshield and post it soon. Have fun & thanx for reading.
Not all of today was tied up in wiring. I prepped and painted the windshield frame with Duplicolor's truck bedliner spray as per Mark's recommendation. It really looks good with a little texture to it. Most of it will be covered anyway, but I wanted to seal it so the rust wouldn't be a problem. I ran short of help today, so it will have to wait for another time for a test fit. That's okay as the dash trough has the bus connectors I'm working on anyway. I only got 2 runs of cable done out of an estimated 8 or 9, so I have a long way to go, but I'm getting into a groove. Can't stress enough the necessity of good tools. I picked up a Harbor Freight ratcheting crimper, hoping it would be the stuff. Wrong. I'm having to more than double my work. Conversing with Mike tonight, he gave me a link for a pair like he uses. I'll be ordering one as soon as I start another build. This one will hopefully be done Monday or Tuesday as far as the wiring extensions go.
Underneath the car, I still had some heat shield in the tunnel to remove, disconnect the 2 O2 sensors, and remove the catalytic converter section of the exhaust. I also removed my damaged (rear right) brake line in preparation for its replacement. I spent some time untangling my mess of wiring harness, and gave Mike some feedback for his wiring section of the build manual in progress. I like Mike. He's doing some really good work. He should be in the shop tomorrow to take a look at what I have a question on. Basically I figured out all the connectors that need extension except the 2-pin connector. I have found at least 8 connectors that look like the one pictured. Some are obviously staying up front, but there are still plenty to choose from, so he's going to look and try to tell me which component or trunk line it's on. Meanwhile I will keep working on the others I know.
Friday I was able to tear apart a little more of that spare (wrecked) red VR6 that I got the motor out of. I'm not counting time on that one as part of this build unless it's directly related to something I have to do for this build. Anyway, I'm hoping to recover its brake line, K-frame, spindles, half shafts, tie rods, and a-arms for my current project. The rest of the car and parts will be sold, stored for another G3F, or taken to the scrap yard. Tomorrow I hope to get the front and rear "axle"/frame stuff off to use (I need the rear for a frame that's got no rear wheel assembly, not the G3F).
Nothing new that hasn't already been posted for pics on the wiring project, but I will snap a shot or two of the windshield and post it soon. Have fun & thanx for reading.
Thursday, August 23, 2012
Day 15 ~ Clean up
A short night for G3F building, but not really a short night in the garage . . . I spent a good deal of time with a bucket of soapy water and a rag cleaning up all the surfaces I could see and easily get to. The engine compartment was a bit nasty, the dash trough dusty, and the rest of the car needed a good wipe-down too. A few parts still need some serious degreasing, but I'll wait until I can roll it outside and hit it with some good degreaser and hose it down.
Other than cleanup, I moved the engine mounts from front to rear and took a good look at the remaining parts I received on the pallet. Mainly the fuel cell and framework. I don't have the hardware to assemble it (nuts and bolts) unless he's reusing donor parts, but from the pictures, I don't think so. I plan to call Mr. Smith tomorrow to check on those, the shifter extension kit, and some advice on whether or not I should use VR6 front hardware (spindles, calipers, rotors) in the rear or not. From what I've seen, they're using 2.0/1.9 model front stuff as it's less beefy than the VR6 equivalent. My problem is that I have like 3 sets of VR6 spare hardware, and if we have to go with TDI, then I'm going to look into converting my TDI daily driver with a VR6 front package upgrade. That's more work than I want to get into right now, but if it's best, then that's what we're gonna do.
It seems I've spent quite a few hours planning the next few days out. I wasn't feeling too good today, and friend needs some help tomorrow getting his car back on the road, so we'll have to see if I can manage it all. Not posting goals this time, but I'll let y'all know if it all got done or not. Stay tuned, if all goes well, there's going to be a lot more pics to upload Saturday.
Other than cleanup, I moved the engine mounts from front to rear and took a good look at the remaining parts I received on the pallet. Mainly the fuel cell and framework. I don't have the hardware to assemble it (nuts and bolts) unless he's reusing donor parts, but from the pictures, I don't think so. I plan to call Mr. Smith tomorrow to check on those, the shifter extension kit, and some advice on whether or not I should use VR6 front hardware (spindles, calipers, rotors) in the rear or not. From what I've seen, they're using 2.0/1.9 model front stuff as it's less beefy than the VR6 equivalent. My problem is that I have like 3 sets of VR6 spare hardware, and if we have to go with TDI, then I'm going to look into converting my TDI daily driver with a VR6 front package upgrade. That's more work than I want to get into right now, but if it's best, then that's what we're gonna do.
It seems I've spent quite a few hours planning the next few days out. I wasn't feeling too good today, and friend needs some help tomorrow getting his car back on the road, so we'll have to see if I can manage it all. Not posting goals this time, but I'll let y'all know if it all got done or not. Stay tuned, if all goes well, there's going to be a lot more pics to upload Saturday.
Sunday, August 19, 2012
Day 14 ~ Suspension
Another weekend passes me by it seems. Actually, it has been pretty stressful for the family this week with the first week of school kicking in. My wife teaches in elementary, Jr. hi, and Sr. hi, and I help out the school on a lot of last minute details. So Saturday we took a chill day resting, playing, and doing some chores around the house. It was good to relax.
Not all was fun and games, though. I got to work separating the front spindles from the old struts, trying to leave as much as possible in tact. That can prove to be more of a pain than it may be worth, but it's not likely to be easy either way. I definitely recommend having a helper. I worked mostly alone as usual and ended up ripping the abs sensor wires on both sides as a result of not being able to hold all the various heavy pieces when things went wrong. Hangar wires are a bit flimsy for anything larger than a caliper. Oh well, it won't take long to repair later on when I work on wiring.
We reuse the upper mount hardware on the new strut, so I had to use a strut spring compressor to disassemble the old struts. Take your time to do it safely here as there's no reward for risk taken. I got a nice set of spring compressors from the local auto parts store on rental. It's good sturdy stuff made for handling the job.
I ran into a couple tough spots today though. Getting all that heavy stuff lined up just right by myself was a bear. I even got help for a few minutes, but it didn't make it any easier as we both couldn't seem to get the right angles worked out. I would recommend disconnecting at least one side from the anti-sway bar so you can work one side independently from the other. One side on the front struts slid into the spindle just fine. My biggest hold-up today was the other side that did not. Someone at the factory apparently forgot to mic the bottom of the tube at the weld. After getting it sufficiently wedged in all but the last quarter inch, and trying in vain to get it to go the rest of the way, I finally decided to take it back off and start over. Wow, I thought the old one was hard to get off. Even using a pry bar in the back to spread the clamp didn't do much good. After I gave it a good piece of my mind (and some finger-flesh too ouch) and finally got it back off, I had to use some 800 grit sandpaper to smooth out the scoring left by the strut's welds. Then I took a small flat file and worked on the welds for a while until I got them down to the cylinder diameter. QC is undeniably important. That strut should have been tossed in the "no-go" bin. Oh well. I'm still counting the time as inevitably every builder is going to face a few snags along the way.
The rear struts got hung too, but they're really just on there loosely as I wasn't able to get the tie-rod to budge. We'll be using it, but I'm going to have to replace that bolt and boot there unless I can get it to cooperate. I picked up another tool to help, but with all the trouble on the front end, ran out of time. I was hoping to have the wheels back on this weekend, but at least the front should be good for now.
Not all was fun and games, though. I got to work separating the front spindles from the old struts, trying to leave as much as possible in tact. That can prove to be more of a pain than it may be worth, but it's not likely to be easy either way. I definitely recommend having a helper. I worked mostly alone as usual and ended up ripping the abs sensor wires on both sides as a result of not being able to hold all the various heavy pieces when things went wrong. Hangar wires are a bit flimsy for anything larger than a caliper. Oh well, it won't take long to repair later on when I work on wiring.
We reuse the upper mount hardware on the new strut, so I had to use a strut spring compressor to disassemble the old struts. Take your time to do it safely here as there's no reward for risk taken. I got a nice set of spring compressors from the local auto parts store on rental. It's good sturdy stuff made for handling the job.
I ran into a couple tough spots today though. Getting all that heavy stuff lined up just right by myself was a bear. I even got help for a few minutes, but it didn't make it any easier as we both couldn't seem to get the right angles worked out. I would recommend disconnecting at least one side from the anti-sway bar so you can work one side independently from the other. One side on the front struts slid into the spindle just fine. My biggest hold-up today was the other side that did not. Someone at the factory apparently forgot to mic the bottom of the tube at the weld. After getting it sufficiently wedged in all but the last quarter inch, and trying in vain to get it to go the rest of the way, I finally decided to take it back off and start over. Wow, I thought the old one was hard to get off. Even using a pry bar in the back to spread the clamp didn't do much good. After I gave it a good piece of my mind (and some finger-flesh too ouch) and finally got it back off, I had to use some 800 grit sandpaper to smooth out the scoring left by the strut's welds. Then I took a small flat file and worked on the welds for a while until I got them down to the cylinder diameter. QC is undeniably important. That strut should have been tossed in the "no-go" bin. Oh well. I'm still counting the time as inevitably every builder is going to face a few snags along the way.
The rear struts got hung too, but they're really just on there loosely as I wasn't able to get the tie-rod to budge. We'll be using it, but I'm going to have to replace that bolt and boot there unless I can get it to cooperate. I picked up another tool to help, but with all the trouble on the front end, ran out of time. I was hoping to have the wheels back on this weekend, but at least the front should be good for now.
Subscribe to:
Posts (Atom)