"Building in Style"

"Building in Style"
Donations for the REAL Smyth shirt are accepted lol

Wednesday, September 19, 2012

Day 19 ~ Rolling Chassis


  Due to the work I need to do to sell my Firebird, I'd like the jacks back. So today I set out to remove the outer CV joints from my old spare set of half shafts. It's pretty simple, just super greasy. The only really tricky part is once you've tapped the end off the splines, getting the balls and cages out. If you like those metal puzzles in Cracker Barrel, then you'll get them out fine. No matter. I got them both cleaned up and installed in the front hubs. This is important for support of the bearings. Do not ever load weight on the wheels without these in place as damage to the bearing will likely result. Well enough about that. I threw the old wheels on and lowered her down...
   Woohoo! It looks pretty sweet sitting nice and low. Clearance is pretty tight on stock offset to the new struts. Looks pretty good now, but I'll be getting the aftermarket wheels on eventually anyway.
  Well, a short night relatively, but some progress, answers from Mark, and preparation for several other big things going on around here this weekend means I'm plenty satisfied with today's work. Peace out!

Tuesday, September 11, 2012

Day 18 ~ Rear K frame & suspension

  Almost have a rolling frame! In fact I almost went ahead and bolted the wheels on just for fun to get the G3F off the jacks tonight, but in lieu of needing to hook up the rear calipers, rotors, brake lines, and tie rods, I figured it would just waste time for an appearance. The tie rods that are stock have ball ends in the power steering boots and threaded portions (14mm) at the outside ends. I unscrewed the rods to remove the power steering assembly (4 bolts) from the K frame.

  Taking up the most time tonight was the strut assemblies' replacements. You would think with all the practice that this would have been easy by now. Not really. Even after replacing the front suspension in my TDI this week, I still had plenty of difficulty getting those spindles loose. There's a tool on ebay ($19.99 free shipping: search "vw suspension tool"), and a set on amazon ($60ish) that looks like a socket with a flat tip screwdriver bit in the end. They're not really expensive, so I highly recommend purchasing one to do the spreading for you. I also had to burn time filing both of the bottoms of the new struts at the welds. So that's 3 of 4 that wouldn't fit down the spread tube without filing the welds that left a lip just wider than the tube. Maybe I can get Mark to make a quality assurance call to the manufacturer he's getting these from. The welds are nicely done. It's just the really tight tolerances don't leave much margin for any excess material.
See both the tie rod end and the cylinder clamp of the VR6
  NOTE: There is a difference between the TDI and the VR6 spindle where it clamps the bottom of the strut. The VR6 is basically one solid cylinder vs. the TDI which looks the same from the outside, but has two 1/2" bands that contact the strut. I found the VR6 to be much tighter and more of a pain to spread adequately.
Using an extra donor mat to keep scratches away as I drag the rear K frame assembly into place ; )
Hoisted K frame up into place. Nice fit!
  I have a bit of work to do getting the brakes looking nice and being functional, but my biggest hold-up for now on the rear spindles is the tie rod modification. In case you're wondering how we get away with a front (turnable) suspension on the rear, Mark made a place to bolt the tie rods into the tubular subframe to lock the wheels in place and also give a toe adjustment for alignment. My only problem is that we don't use the stock tie rods, but I don't have any hardware that substitutes the tie rod. I'll put that on my list of things to request from Smyth Performance tomorrow when I call. No matter, though, I'm sure he has a little goodies list of things to send me soon. We just want to make sure all the kinks are worked out before production hits. The last estimate I heard on that was the end of this month, but I believe that's optimistic by several months. I'd guess high 80's to 90% completion by this month. There's the finished top to consider, VR6 exhaust and manual tweaking, any 1.8T differences in development, and probably a few more things that need to be buttoned up before a full-scale production operation gets underway. In the mean time, that high percentage of finished items can keep any further buyers busy for quite some time, so no worries here. I've been kind of slow getting to things around here because I'm finding parts I don't yet have are "next" in my assembly, and I've had an overwhelming amount of maintenance and other issues coming up lately. As usual, there's still plenty to keep me busy before I run out of things to do. I plan to get the windshield frame, rear brake lines, rotors, and calipers installed, and put the wheels on the ground next. Then I work on swapping the tranny to the replacement motor, and giving that all a good once-over. Once I remount the engine in the back, I can begin plumbing and routing of all the systems and components. Sounds like fun!

Tuesday, September 4, 2012

Day 17 ~ Wiring 2 and Misc.

  I put in about 2.5 hrs on wire splicing until I ran out of connectors for the larger gauge wires. I got plenty of the small ones, but only half the larger ones I needed in the shipment. I'll make sure there's an inventory adjustment so you won't have to worry about it when you get your kit. Simple fixes . . . beta = )
  After going at it for a long time, I found myself starting to make a couple mistakes, so I took a break from the wiring so as not to mess up something critical. I need some coffee or a Monster energy drink or something to finish up those last couple connector extensions. Still waiting to hear from Mike on a double-check of the VR6 wiring, but I can finish all but the 2-pin connector according to the manual so far. If any other betas working on (or finished with) wiring want to point us in the right direction, what component is the 2-pin extension going to/from? I found 8 identical connectors, of which 3 or 4 could be eliminated, but could use some help figuring out which component I'm running an extension to. We'll get it double checked and clarified in the manual. Other than that, the rest seemed easy to find and extend so far.
   The goal is to get the G3F off the jack stands and onto its own wheels, so I spent some time getting the extra K-frame et al ready for installation. I still have to pull the OEM struts, source some calipers, and figure out the tie-rods and half shafts configuration. Then I'll bolt the frame on, hook up the new struts, and put the wheels back on for "rolling frame" status.
   Sorry about my long silence, last week was spent heavily in dismantling the spare VR6 I bought for the engine. I got that one completely gutted, kept anything usable, and scrapped the rest. Then I cleaned the engine a bit and pulled off anything that was deteriorated or damaged. I'll be dividing some efforts between electrical extensions, suspension installation, and engine preparation until I get some more parts. After that, I expect to fill up the tunnel with heater hoses, shift cables, and all the rest of the plumbing. Seems simple enough, but I'm learning everything is taking longer than I expected. ;)

Saturday, August 25, 2012

Day 16 ~ Wiring 1

 Mark Smith chatted with me yesterday and was able to steer me in some good directions and also confirmed some details with me so he can send me some more goodies. Yeah! I ran into a little different scenario as originally I had planned on using my TDI for the donor, but changed my mind later on when a local shop had a VR6 sitting in the lot collecting dust. The issue is, once you order a kit, Smyth Performance goes through their lists for parts based on the donor you're using. There are several differences between the TDI and VR6 of course, but also between 5 and 6-speed manual tranny's. So after some confirmation and good conversation, Smyth Performance will be sending me some items (like shift cable extension kit & other hardware) soon that will work for my build. I still have enough to keep me busy for a while, but it's nice to think ahead. Apparently there are 12 builds currently taking place. I don't know who they all are, but chime in anytime here if you are a beta with links and info as you see fit. BETA's I know of so far that are building now: John #1 Phillips, Clint "Redjoker" Frysinger, Bill Shaw, Bob #24 Terranova (25 min away), Uwe Lenger, Robert Zeien, Jalen Smith, and I'm pretty sure Mike Gallant's and Kim's VR6 are being worked on too at the HQ.
  Not all of today was tied up in wiring. I prepped and painted the windshield frame with Duplicolor's truck bedliner spray as per Mark's recommendation. It really looks good with a little texture to it. Most of it will be covered anyway, but I wanted to seal it so the rust wouldn't be a problem. I ran short of help today, so it will have to wait for another time for a test fit. That's okay as the dash trough has the bus connectors I'm working on anyway. I only got 2 runs of cable done out of an estimated 8 or 9, so I have a long way to go, but I'm getting into a groove. Can't stress enough the necessity of good tools. I picked up a Harbor Freight ratcheting crimper, hoping it would be the stuff. Wrong. I'm having to more than double my work. Conversing with Mike tonight, he gave me a link for a pair like he uses. I'll be ordering one as soon as I start another build. This one will hopefully be done Monday or Tuesday as far as the wiring extensions go.
  Underneath the car, I still had some heat shield in the tunnel to remove, disconnect the 2 O2 sensors, and remove the catalytic converter section of the exhaust. I also removed my damaged (rear right) brake line in preparation for its replacement. I spent some time untangling my mess of wiring harness, and gave Mike some feedback for his wiring section of the build manual in progress. I like Mike. He's doing some really good work. He should be in the shop tomorrow to take a look at what I have a question on. Basically I figured out all the connectors that need extension except the 2-pin connector. I have found at least 8 connectors that look like the one pictured. Some are obviously staying up front, but there are still plenty to choose from, so he's going to look and try to tell me which component or trunk line it's on. Meanwhile I will keep working on the others I know.
  Friday I was able to tear apart a little more of that spare (wrecked) red VR6 that I got the motor out of. I'm not counting time on that one as part of this build unless it's directly related to something I have to do for this build. Anyway, I'm hoping to recover its brake line, K-frame, spindles, half shafts, tie rods, and a-arms for my current project. The rest of the car and parts will be sold, stored for another G3F, or taken to the scrap yard. Tomorrow I hope to get the front and rear "axle"/frame stuff off to use (I need the rear for a frame that's got no rear wheel assembly, not the G3F).
  Nothing new that hasn't already been posted for pics on the wiring project, but I will snap a shot or two of the windshield and post it soon. Have fun & thanx for reading.

Thursday, August 23, 2012

Day 15 ~ Clean up

  A short night for G3F building, but not really a short night in the garage . . . I spent a good deal of time with a bucket of soapy water and a rag cleaning up all the surfaces I could see and easily get to. The engine compartment was a bit nasty, the dash trough dusty, and the rest of the car needed a good wipe-down too. A few parts still need some serious degreasing, but I'll wait until I can roll it outside and hit it with some good degreaser and hose it down.
  Other than cleanup, I moved the engine mounts from front to rear and took a good look at the remaining parts I received on the pallet. Mainly the fuel cell and framework. I don't have the hardware to assemble it (nuts and bolts) unless he's reusing donor parts, but from the pictures, I don't think so. I plan to call Mr. Smith tomorrow to check on those, the shifter extension kit, and some advice on whether or not I should use VR6 front hardware (spindles, calipers, rotors) in the rear or not. From what I've seen, they're using 2.0/1.9 model front stuff as it's less beefy than the VR6 equivalent. My problem is that I have like 3 sets of VR6 spare hardware, and if we have to go with TDI, then I'm going to look into converting my TDI daily driver with a VR6 front package upgrade. That's more work than I want to get into right now, but if it's best, then that's what we're gonna do.
  It seems I've spent quite a few hours planning the next few days out. I wasn't feeling too good today, and  friend needs some help tomorrow getting his car back on the road, so we'll have to see if I can manage it all. Not posting goals this time, but I'll let y'all know if it all got done or not. Stay tuned, if all goes well, there's going to be a lot more pics to upload Saturday.

Sunday, August 19, 2012

Day 14 ~ Suspension

  Another weekend passes me by it seems. Actually, it has been pretty stressful for the family this week with the first week of school kicking in. My wife teaches in elementary, Jr. hi, and Sr. hi, and I help out the school on a lot of last minute details. So Saturday we took a chill day resting, playing, and doing some chores around the house. It was good to relax.
  Not all was fun and games, though. I got to work separating the front spindles from the old  struts, trying to leave as much as possible in tact. That can prove to be more of a pain than it may be worth, but it's not likely to be easy either way. I definitely recommend having a helper. I worked mostly alone as usual and ended up ripping the abs sensor wires on both sides as a result of not being able to hold all the various heavy pieces when things went wrong. Hangar wires are a bit flimsy for anything larger than a caliper. Oh well, it won't take long to repair later on when I work on wiring.
  We reuse the upper mount hardware on the new strut, so I had to use a strut spring compressor to disassemble the old struts. Take your time to do it safely here as there's no reward for risk taken. I got a nice set of spring compressors from the local auto parts store on rental. It's good sturdy stuff made for handling the job.
  I ran into a couple tough spots today though. Getting all that heavy stuff lined up just right by myself was a bear. I even got help for a few minutes, but it didn't make it any easier as we both couldn't seem to get the right angles worked out. I would recommend disconnecting at least one side from the anti-sway bar so you can work one side independently from the other. One side on the front struts slid into the spindle just fine. My biggest hold-up today was the other side that did not. Someone at the factory apparently forgot to mic the bottom of the tube at the weld. After getting it sufficiently wedged in all but the last quarter inch, and trying in vain to get it to go the rest of the way, I finally decided to take it back off and start over. Wow, I thought the old one was hard to get off. Even using a pry bar in the back to spread the clamp didn't do much good. After I gave it a good piece of my mind (and some finger-flesh too ouch) and finally got it  back off, I had to use some 800 grit sandpaper to smooth out the scoring left by the strut's welds. Then I took a small flat file and worked on the welds for a while until I got them down to the cylinder diameter. QC is undeniably important. That strut should have been tossed in the "no-go" bin. Oh well. I'm still counting the time as inevitably every builder is going to face a few snags along the way.
  The rear struts got hung too, but they're really just on there loosely as I wasn't able to get the tie-rod to budge. We'll be using it, but I'm going to have to replace that bolt and boot there unless I can get it to cooperate. I picked up another tool to help, but with all the trouble on the front end, ran out of time. I was hoping to have the wheels back on this weekend, but at least the front should be good for now.

Tuesday, August 14, 2012

Day 13 ~ X-braces

  Today was a short one after my full-time job, TDI service, dinner, and some family time at the pool. I had to grab some supplies from Lowe's and get a couple more tools for later on also. So in light of all that, I'm happy with getting the cross braces aligned, drilled, and snugly installed. Nothing much to report here other than one possible tip. The bottom bolt (M14) for the X-braces has two elongated holes provided, so leave it just barely loose enough to move around while you get the side plates flush with the frame. Then after you have the side plates tightened, go back and tighten the bottom bolt.
  Also, I didn't have a 10mm drill bit handy (for the top of the x-brace), so the 3/8" had to do. That said, ya gotta give the bit a little wiggle after you punch through to widen the holes just a tad. Works good, snug, and looks good too (which is important ; ).
  Goals? Yeah I like setting at least a couple goals to shoot for, so we're going to hit it again Thursday and go for getting the new shocks on...at least in the rear. It sounds simple, but it's a bugger sometimes getting the old spindles off. Note to self: remember to "rent" a coil spring compressor from O'Reilly Auto Parts tomorrow. That's all for now. Thanx for reading. = )

Monday, August 13, 2012

Day 12 ~ Post-Olympic Miscellaneous

  Finally the TV is not burning constantly. It's kind of hard to buckle down working extra projects when the Olympics are on I must admit. Now that they're done for a year and a half, we're good to go.
  I spent a good while today rummaging through all of the facebook albums on the Smyth Performance page, reading the various comments and seeing if I could make enough sense of the scope to press forward. It's a bit difficult for me to know what's next exactly, because some of the parts I have are installed over/on/after some of the parts I do not yet have. No matter, I still have plenty I can work on. I went through my trailer full of spare Jetta parts I've been collecting and cleaned up the extra K-member I'll be using in the rear. I was going to separate the spindles for the rear wheels, but ran into trouble on the tie-rod bolt. After fussing with it for a while I decided to move on.
  The rear subframe height adjustment still had to be made, so I knocked that out as per my last post's idea. A word of caution though: if you take the rear lower mounting bracket off, make sure you don't clean it. You will need to see the original placement indicated by the dust rings. There is room for play on all four bolts, but you don't want to throw out any adjustment, so I recommend just replacing it exactly where it was when you're done with it. The subframe's lower tie-rod will likely be putting some pressure on the bracket one way or another, so keep it turned out of the way just a bit so you can remount the bracket before slipping the through-bolt in there.
  On to the lower X-brace. I had to cut off a little mounting stud from the right side rail just in front of the rear mount bracket (formerly used with the fuel-line plastic retainer). Both sides have a nice little plastic plug that pops out so you can slip the 14mm bolt down through it and have room for some adjustment. Go ahead and get the nut started on that bolt with the x-brace arm. I tightened it up a little just to get it flush with the bottom surface, but loose enough to be able to still position it just right. You're going to have to drill 3 times per side, so it's handy to have the bolt hold it in place once you've got it lined up and in the center bracket. I did not end up drilling yet as it was getting too late, and I was short on hardware to put in the holes anyway. Somewhere along the way I'm out 16 washers, and one of the lock nuts I have is the wrong thread pitch, so a trip to Lowe's tomorrow should remedy that. I need to pick up a better drill bit set too, so no biggie...just frustrated my effort today to get more accomplished.
  All in all, there's not a whole lot to see of the progress, but I was able to get a better understanding of some of the next steps, and I have a few more parts staged for installation. I have much higher hopes for this week than last for progress on the G3F, so stay tuned. My 240k mile services are due on my TDI (non-donor daily-driver . . . for now), so most of that will go pretty quick. I already have the oil/filter change done, and the fuel filter, air filter, and cabin air filter arrived, so they'll be going on tomorrow. The only thing that may really hold me up an extra day is the timing belt. It will be my first time, and it's not really an easy one anyway, but I gotta do it. So not worth skipping the timing belt ; )

Monday, August 6, 2012

Day 11 ~ Rear Subframe Bolt-On

  Hoo-rah! Got the rear subframe bolted on tonight. It seems a bit simpler than it ended up being, but we got 'er done. Not all the holes line up necessarily, but they're pretty close. I have a couple pics that should show this and it's remedy.
Don't force a bolt through that.
Pin a jack here...
  The lower threaded rod support is nice to be able to adjust the subframe to the right height, but you

Protect that finish!
My lower right was too far back.
Ratchet it at a strong point on the
B-pillar. Remember you're on jack
stands, so don't push or jerk!

cannot adjust it while still attached. So I got the 4 (of 8) front B-pillar bolts in  to hold it in place, then took the laser-level to check the height. You'll find the pics in Mark's facebook album that say the tow rings (at the far rear) are going to be about 3-1/2" below the laser line that's level with the lower door-sill. Once the crane was holding the subframe at the right height, I held the lower mount connector (with the through-bolt in place) up to the bottom of the threads and counted the number of threads that should be exposed when I screw it on. In my case, 14 seemed perfect on both sides. Upon putting it all back on (I took the whole thing off because I couldn't get clearance to turn the rods on but keep reading as you won't have to do that), the right side is perfect, but the left is about 1/8" low. Instead of removing the whole subframe again, I'm going to loosen (slightly) all the mounting bolts to allow natural flexing and stress equalization, unbolt the left "rear axle" through-bolt, and then remove the 4 bolts holding the stock rear axle mount to the frame. This should allow me clearance to make my 1 thread out adjustment which will hopefully raise the left rear just enough.
  It's time for some sleep, so I'll make that quickie adjustment tomorrow and move on to other parts. The G3F is taking some shape with that subframe attached! I'm going to call it the G3F officially now, as it's now quite a bit less Jetta, and as of tonight a big step toward the final product.
Bolt too short for washers. It's really fine here without them
anyway (lower left B-pillar mount viewed from inside).
  Oh, one other note...I'm going to recommend that 2 of the 4 bolts Mark provides for the B-pillar mount be just a 1/4" longer or so. With the washers on and the thicker material at the bottom pillar mounts, the bolt didn't reach all the way through the lock-nut, effectively making it useless only holding by 3 unlocked threads. I remedied it by removing the 2 washers on either side. In order not to damage the finish on the subframe, I just stabilized the bolt with a wrench and used the socket to turn only the nut (proper procedure anyway, but critical here). There's plenty of surface area with lots of meat, so there's almost no real need for the washers, but it does look better with them.

Saturday, August 4, 2012

Day 10 ~ Final Cuts

 Getting the last few pieces of sheet metal off according to the guidelines took a couple hours and some patience. Again, the combination of pictures an videos on the Smyth Performance blog and youtube channel proved very helpful. At least until the end of the month, when the build manual is expected to be final drafted, I recommend spending a good amount of time perusing these. Still, there's a little bit of questions that can come up even when your staring at your car and the pictures. A final review of the pertinent videos and a couple texts to Mark showing a picture of my question and getting some advice got me going.
  At long last, I'm ready to start the rebuilding segment! I'll have to read up on the blog and look at the next album of pics on facebook, but I plan on starting this maybe Monday. Today was a short day on the build, but with a constancy of life/work, I need a little break. Going to go enjoy some worship tomorrow at my church, and probably crash the afternoon at a friend's place. More pics to come soon . . . and progress too!
  Another FYI for you betas in waiting. If you're not using your donor constantly, go ahead and start gutting and cutting. I've got quite a bit of time invested already without ever having to touch the kit parts yet. You can be confident that there's plenty to do to get ahead if you have the time and space.

Friday, August 3, 2012

Day 9 ~ Last Prep. for Final Cuts

   As usual, things took a little longer than I expected, but we're good to go on the cutting tomorrow. I got the rest of the harness out of the way along the left inner fender support area, the windshield trough, and the dash area. I also cleaned out the wiper motor and assembly, computer, and cabin air intake from that windshield trough area just to make sure I don't mess anything up when the blades go flying in there soon.
  The dash took me a while to lower out of the way too. Just like engines the first time around, there always ends up being something else holding it up. A few connectors and harness straps needed to be removed, but the stupid part about the thing that I couldn't see for some reason was that 3-bolt dash support that bolts to the left inside A-pillar. I suppose I could have read that in the Bentley manual, but then I'd have wasted a bunch of time reading all the other steps that had already been done before I got the manuals. Something in Mark's pictures on the facebook cutting album and his blog reminded me of this piece, and sure enough once that was gone I could gently lower the dash enough to get out of my way for the cuts.
   As I'm sitting here typing I just remembered a part of the inner dash cut that I didn't mark, but other than that I'm ready to hack up the front end and most of the rear. There's still a question for me on the rear final cut, but I'll have to call Mark tomorrow on that.

NOTE: I knew I'd watched some of these before, but as they didn't make much sense to me without the thing in front of me, I'd long forgotten they existed until today. Thanks to JLP's build blog that I've read through several times, I noticed the link to Mark Smith's video's on YouTube. These provided great clarity and confidence now that I've actually gotten there. I will also post links in my sidebar for this purpose. Had I watched these last week, I could be a bit farther along. Not too far though, as usually I find plenty to do to keep going.


   Well tomorrow I'm off to start my day tracking down a reciprocating saw I can borrow as my own hasn't turned up. Due to the regular knowledge of inventory and location of all my tools, I'm beginning to believe my wife who thinks I didn't actually buy one, just shopped for it. Well, if my neighbor doesn't have one, I'm off to Fayetteville to go get one. It's okay really as I'll probably need a couple more blades anyway. Just bummed I didn't remember them right after work today. I guess that's the banes of living way out of the big cities. Maybe I'll get a good bike ride in. Been really missing that lately. = )

Thursday, August 2, 2012

Day 8 ~ Engine Removal [part 2]

   Another long day at work with only a couple hours to "play" at the end . . . and the engine is out! Wow, those half shafts took a while for me to get all the bolts out with that M10 triple square bit. That and I had to mess around with the jack stands a bit. I tried to jack the car up from the K-member but with all the weight gone in the rear, it kept wanting to tip over on the nose. Time to call for some help from my lovely assistant. "Sit on the back for me, Babe, while I get this car all situated." Sometimes just having some company makes it all seem more fun, and sometimes it's just plain not safe without a helper. I'm not counting the half hour it took us to figure out where the heck to put the motor/tranny combo as I don't have any room in the garage to even get it around the Jetta to the rear. So, we decided to hoist it while still on the cherry-picker up into the bed of my Dakota. Then I had to find the right angle to rest it so as not to bend or break anything that I'll still be needing. I strapped it down good and will take it down to the shop to swap the motors and work on refurbishing the setup there sometime in the future.
  Meanwhile, I have still a bit of piping and hardware to remove, but I'm exhausted, and need to read up on some earlier beta's notes to make sure I don't waste any time removing something that may stay. Regardless, I got an email off to Mark, and he's gonna get with me to clarify any questions so I can prepare for the final cuts tomorrow. I'm leaving the whole evening for the unexpected "that's still in my way doggone it!" pieces, but I'm still planning to have all my final cuts done Saturday.
  Can't wait to get some parts back on the car! But I'm not going to rush-job it. I'll make sure things are clean and tidy a bit, so I don't have a mess underneath when I'm all done. But that's the way I am . . . try to do it right the first time even when it takes extra time up front (up to a balance point, no one's looking to waste time here). It will be worth it later. I'll get some more pics taken and uploaded tomorrow so I can edit this post and bring in a little flavor.
  = )

Wednesday, August 1, 2012

Day 7 ~ Engine Removal [part 1]

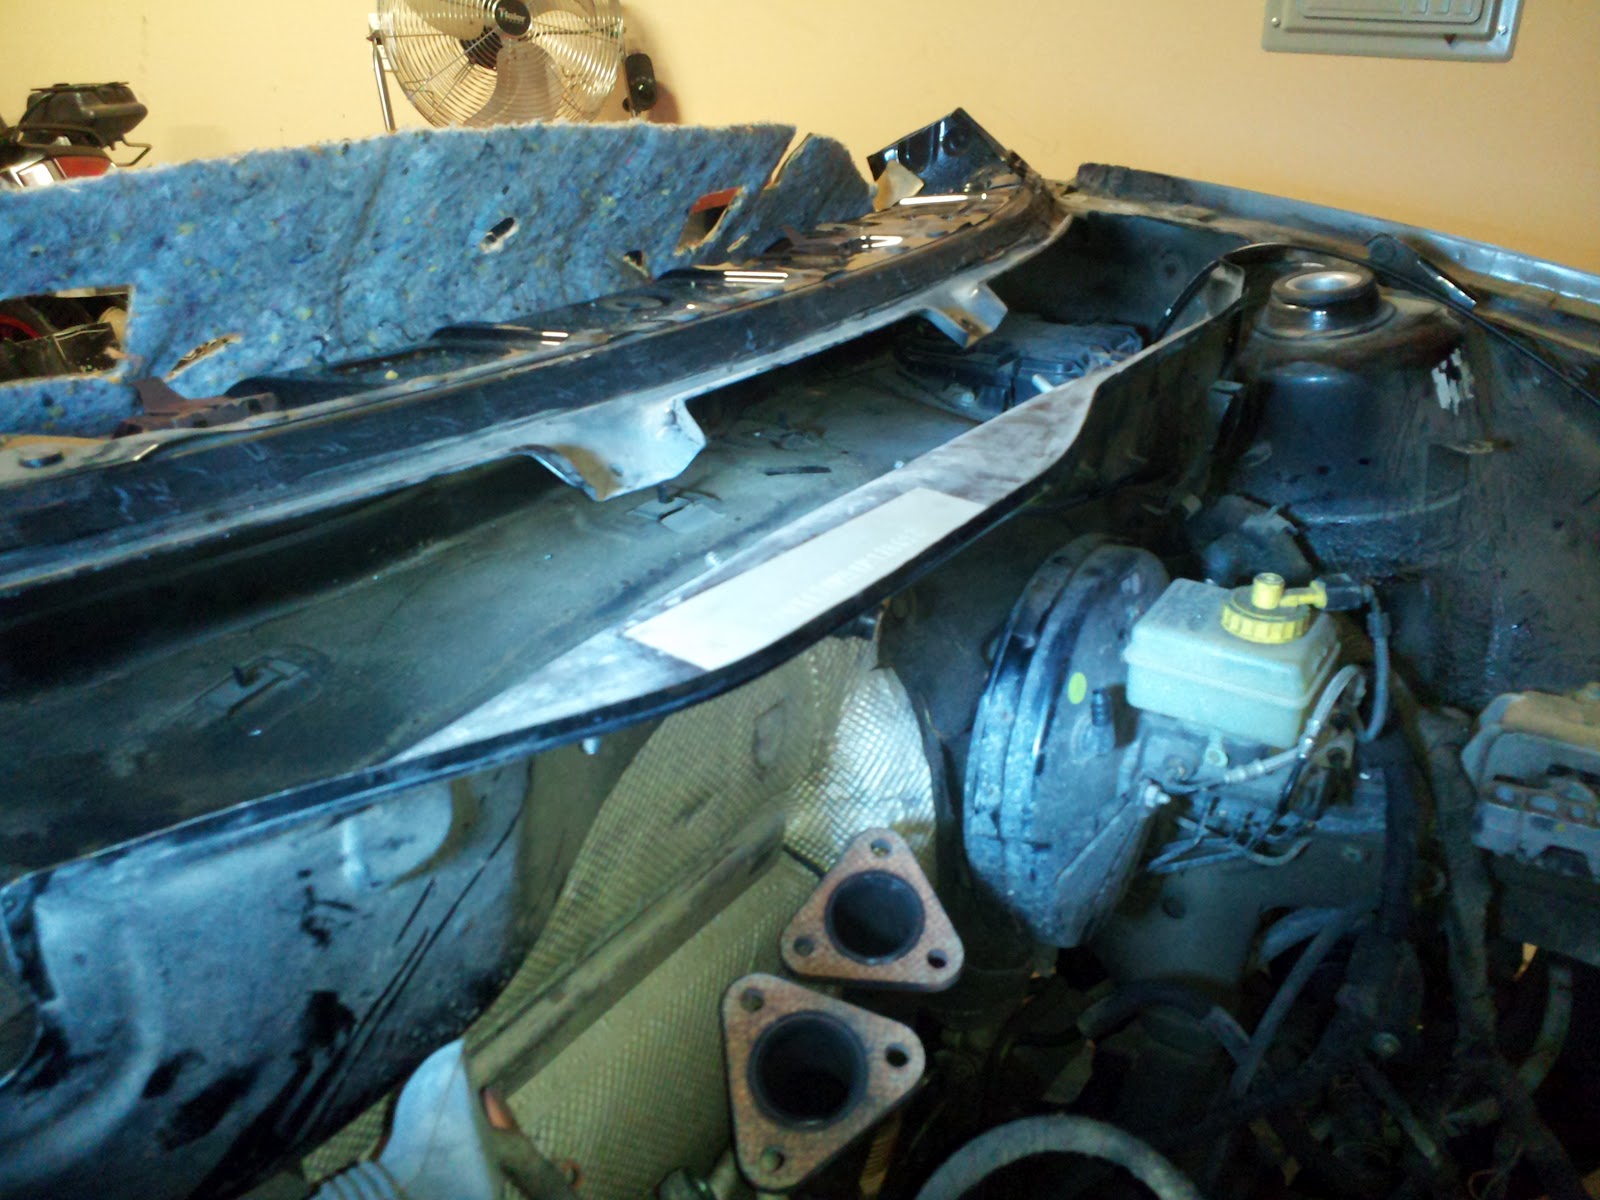
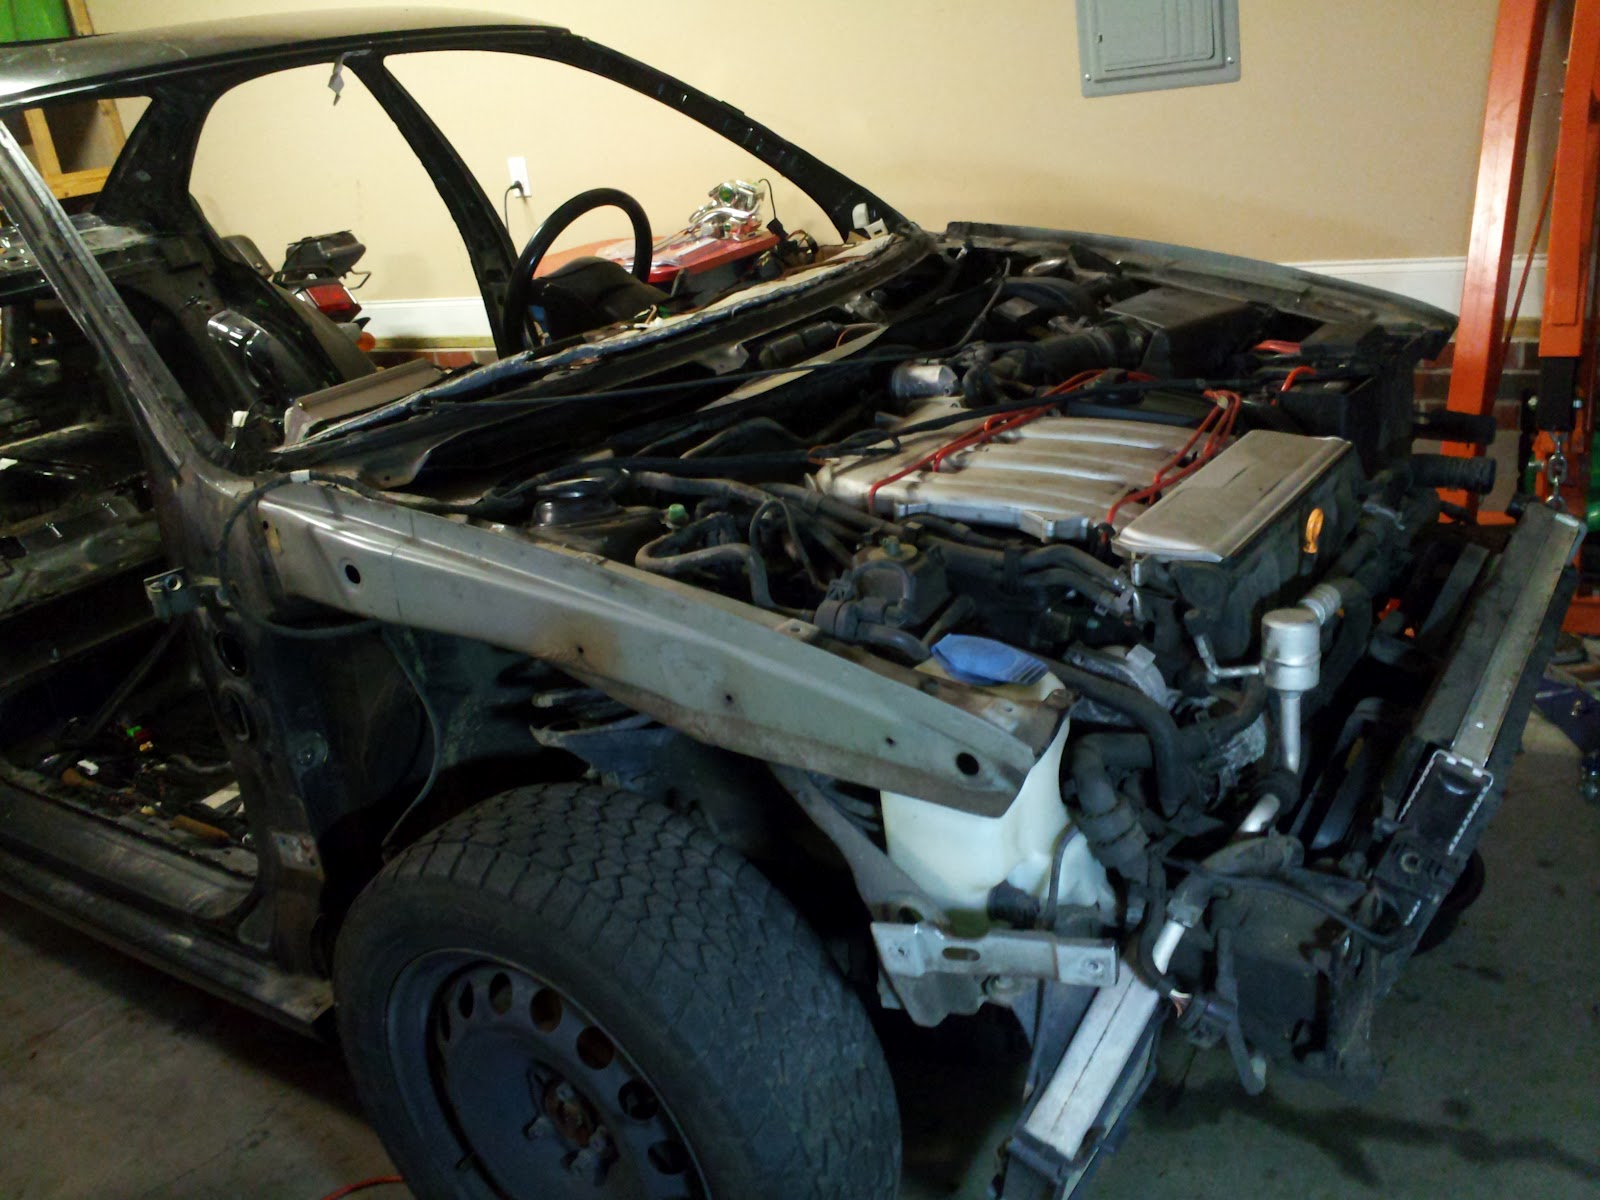
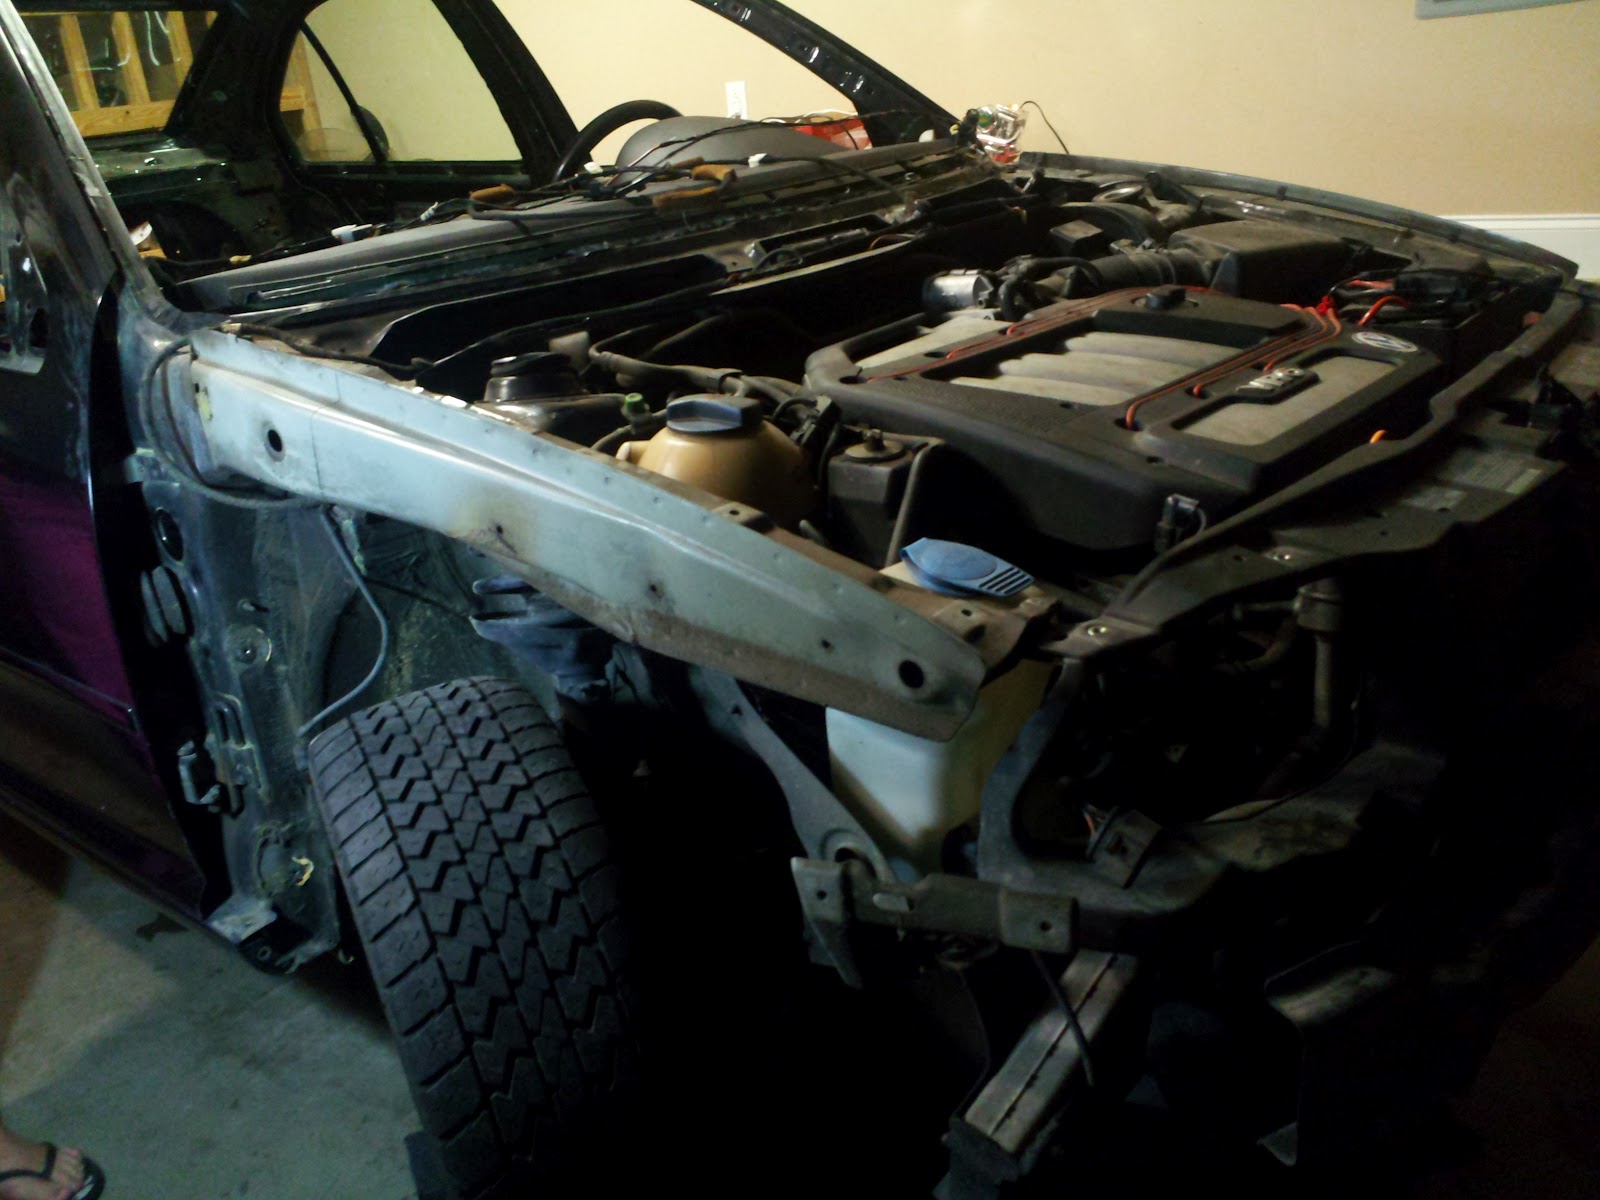
Hoses, belt, connectors, etc. My goodness there's a bunch to disconnect to be able to pull the engine w/o damage. I "only" got the ignition wiring, serpentine belt, belt tensioner assembly, radiator(s), condenser coil (had the r134 recovered already), power steering pump, air conditioning compressor, alternator, water hoses, fuel & evap lines, vacuum hoses, battery & tray, air box, intake manifold, and electrical wiring harness disconnected and out of the way. Other than that, I removed a few brackets and do dads here and there.
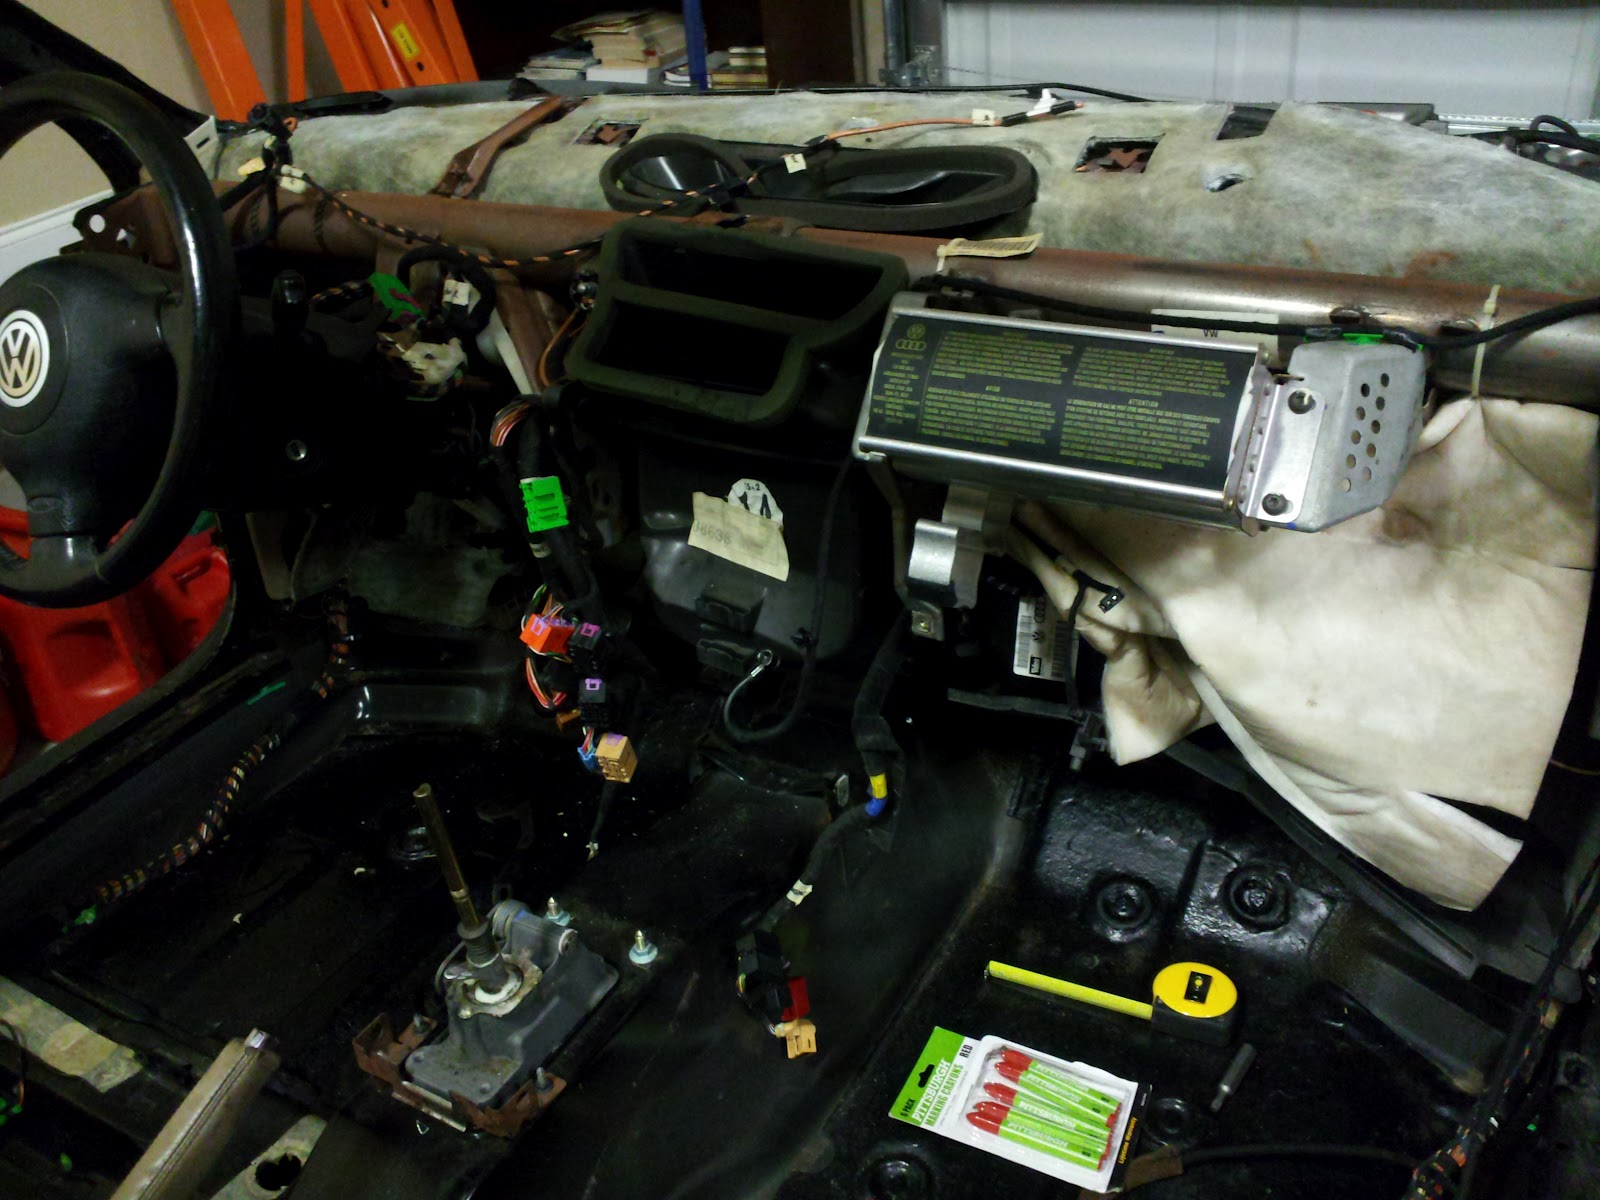
   Labeling is key! I used masking tape and a marker to label most of my wiring connectors and hoses (I say most, but recommend all especially if you're unfamiliar yet as to what does what in the engine compartment). I didn't personally choose to label everything because I've removed a handful of engines now and have a basic system that works for me. Oh, if you don't know what every little component is and what it goes to that's fine! Sometimes the thing that works is using numbers to label both sides of a connection. If you start from say a large portion of the harness near the battery, you just label the first connector "1" with a piece of tape around the wire (again, on both sides of the connection). Follow the strand as it gets smaller out to the ends, then come back to where it really branched off and continue down each branch progressively increasing your numbers. This helped me dramatically the first couple times I pulled an engine. No looking around wondering if you got them all...just keep counting up when you put them together. For the odd exception, it's helpful to have a sheet of lined paper handy to jot the numbers down so you can check them off if you feel the need to put them back together out of order. You don't want to turn the key and have some stuff disconnected. It's much more difficult to figure out what's wrong once everything's back together than it would be to follow a sequence. Also the lined paper is helpful to educate yourself as you figure out the names of the components. Just jot it down beside the number and you'll be sharp as a tack in no time.
   Most people are recommending the "Bentley" manual to follow for a good disassembly order. I would agree. I got the Haynes, and compared to the Bentley, it's a different world. Informative, clarity, comprehensive...these are all words which don't apply to the likes of Chilton and Haynes but do fit the Bentley. It cost me about $80 to get a new hardback 2-volume set, but it's worth it. Even so, there are a couple errors (to be expected with almost any technical manuscript I've seen), but even when it wasn't clear, it still proved a good guide anyway. Besides, if something's in your way and hard to get to, just remove it. We're gutting the thing and moving it all back to the rear anyway, so no need for acrobatics and special tooling. Just keep track of where you are in the process so you can refer back to it when you're done with your rabbit trail.
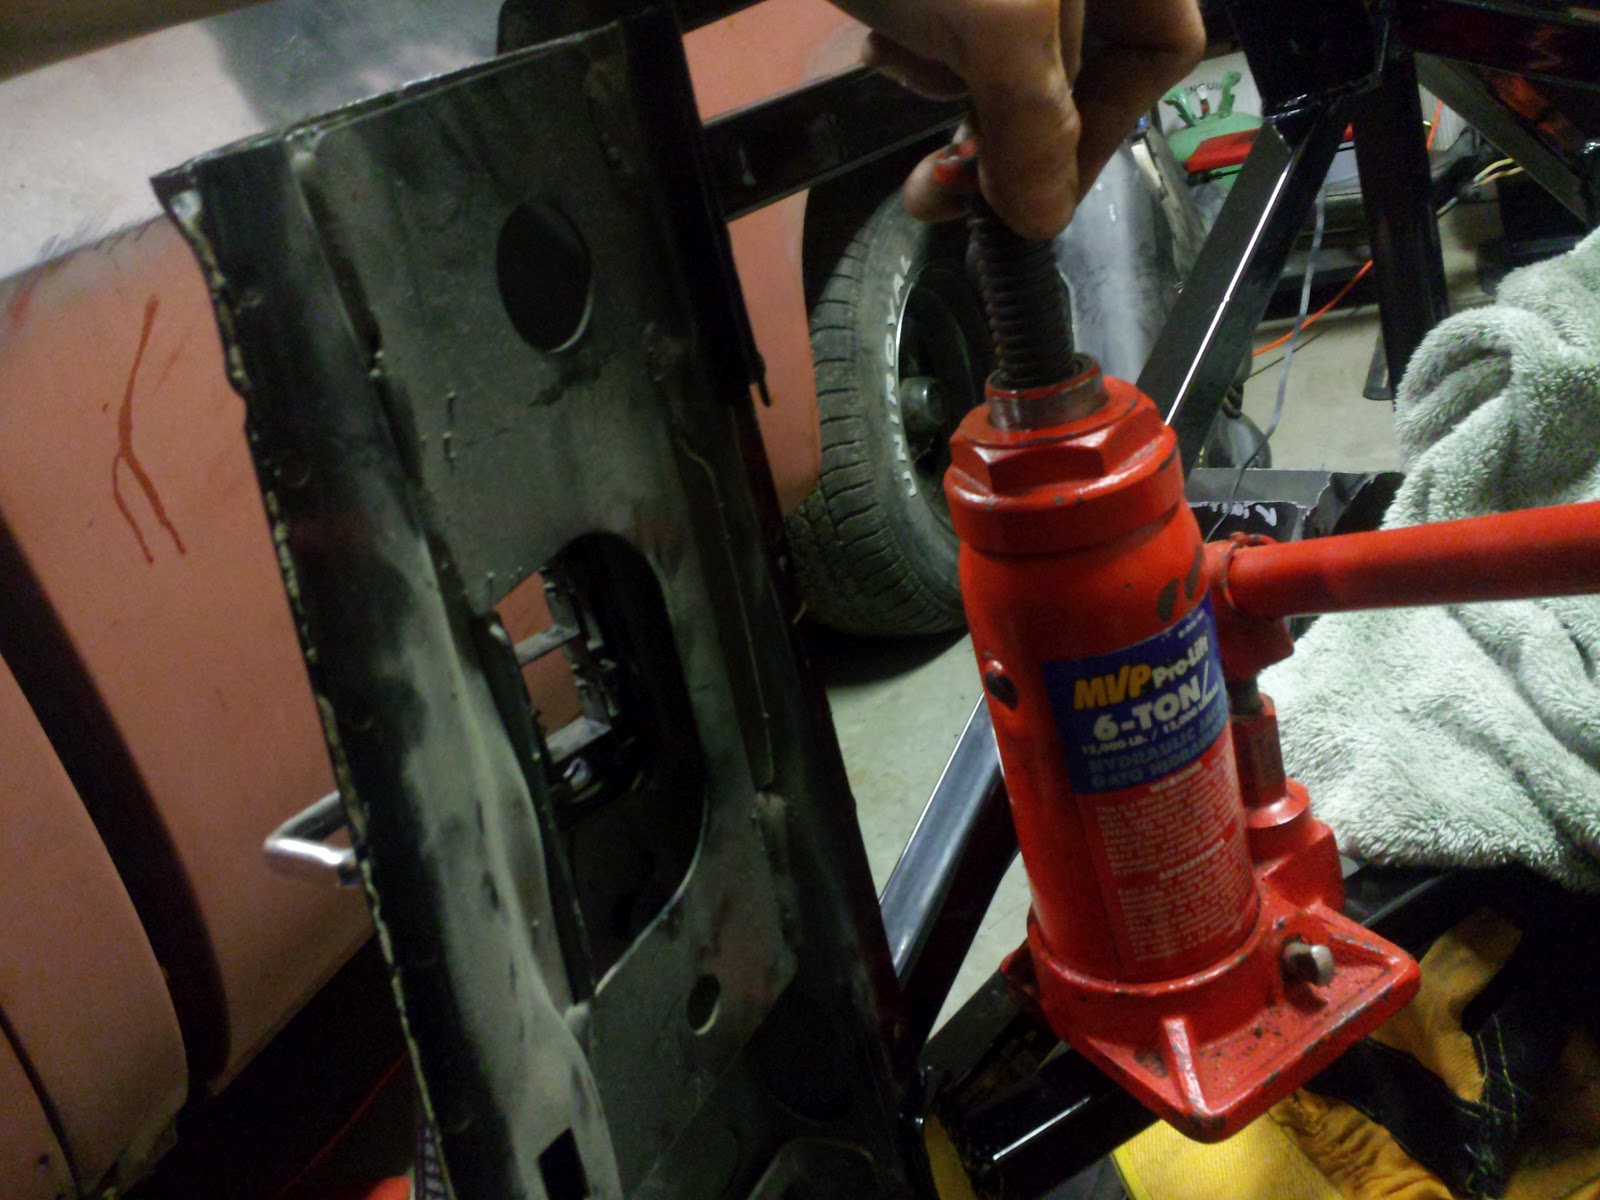
  Well, there's still the 6 exhaust manifold bolts, 3 engine mounts, and half-shafts to remove, plus the one or two wires I inevitably missed on the first pass. Then we'll be in business pulling the engine/tranny combo. I'll be separating the tranny to swap engines with another VR6 Jetta's I just picked up a couple days ago and pulled. The separation and mating of the motor and tranny will not be counted in the build time unless it becomes apparent that it needs to be done for the average builder. In my particular case, I have a bad motor that needs serious work, which I'll swap with one that will hopefully only need a little tlc.
  No pics today...too tired and there's nothing much exciting about engine removal prep.

Goals:
  Thursday ~ Finish engine removal and gut the remaining things that need removal along the wheel wells and firewall/dash area.
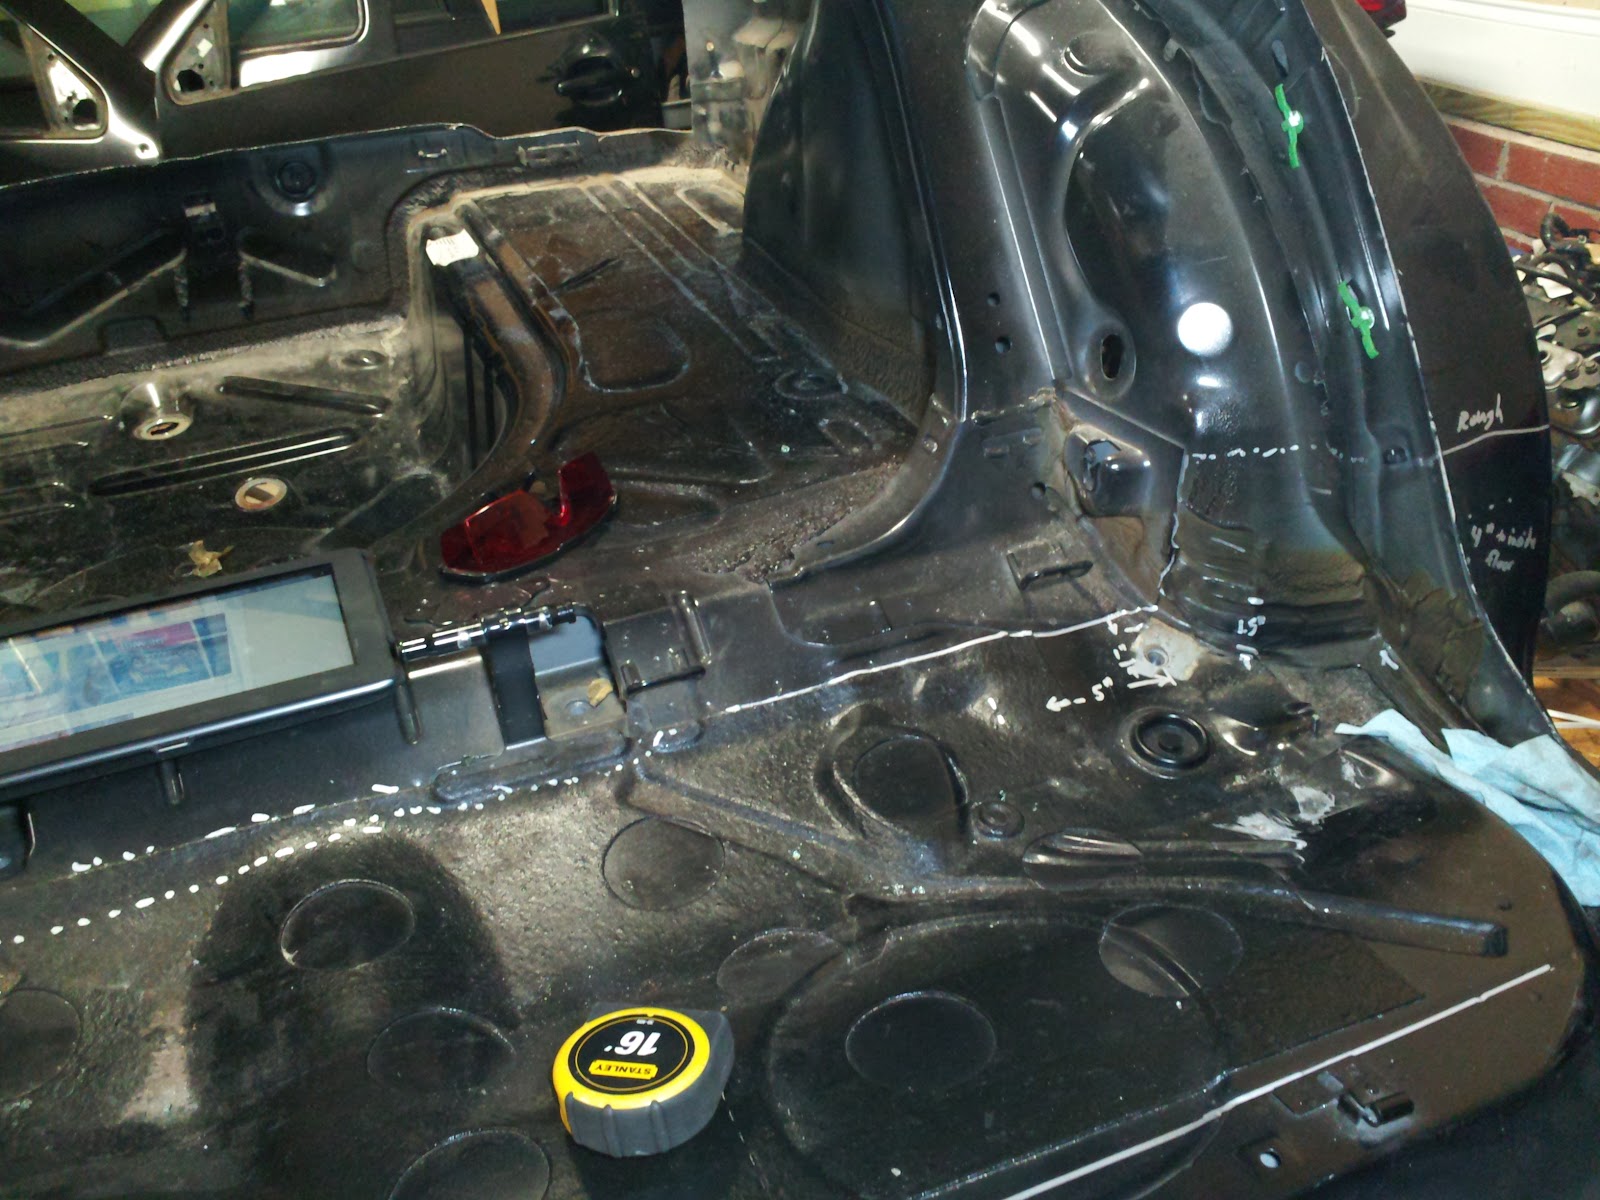
  Friday ~ Get a better understanding from Mark about the final rear-cut lines (I marked them up, but something doesn't look the same as his pictures, so I'd better check first) by Friday so I can finish the remaining cuts
  Saturday ~ Rust-prevention-paint-spray all the cut areas, & start putting kit parts on the Jetta!

We'll see if I'm overzealous or not. I'm getting pretty tired out with late nights and long, hard, hot days at work. The body's really starting to complain. I'm hoping to work through it and just get used to it after a while like I've done before. If not, I'll have to just rest a couple days. I really want to get all the kit parts I have installed. Then if more haven't arrived by then, I can take a break, work on the motor, or gut and scrap the wrecked VR6 frame I just got the other day for the motor. I'll be scavenging anything useful. Then it's off to the metal recycling yard for some cash. = )

Sunday, July 29, 2012

Day 6 ~ Adding Lightness

A motto for Lotus for many a year is not to reduce weight, but rather to add lightness. Well, I'm not sure we haven't just reduced weight on this one so far, but my Jetta is looking a bit more Lotus-esque these days. After all my setbacks this weekend I'm feeling good anyway. Having helped move my best friend yesterday, and soaking in some Olympic coverage, it was a busy weekend to get anything done. Nevertheless, the list of removed things increased dramatically today:
Rear shocks
Rear wheels
Rear springs
Rear axle w/calipers, hubs, rotors, etc.
Fuel tank, evap assembly, and filter
Trunk surround cutout
Top and rear shell
  It took me a while to sort out just where to make the rough cuts, referencing the finals. I'm fairly confident with the reciprocating saw, but no sense trying to do the final cut with all that weight on it. I did, however decide to cut out the trunk surround in one cutting before I rough cut and removed the shell. It seems a much easier idea to get that taken care of while everything's still solid and at a working height.

TIP: Removing the rear window proved super helpful in making that cut for the trunk surround. It's really just starting the big horizontal cut that's the issue there. Keep that blade parallel to the ground on that one also so it cuts through only 2 pieces of sheet metal. Goes pretty good here.

TIP: Use standard 9" blades. I tested out the carbide tip blades because I use the regular ones often and wanted to try it. Unfortunately it cuts (grinds really) about an eighth inch wide path instead of about half that, so the cutting takes a lot more pressure and time. Not really worth it in my opinion. I was happy to go through 4 regular blades instead. I did all the rough cuts, and trunk surround in 3, but since I'm working by myself mostly, and occasional help from my super-patient wife (she's pretty strong too, I've found out), I made a few more cuts to take as many manageable pieces off the trunk to save weight. Payed off as I have all that scrap in the bed of my truck now ready for the scrap yard.

DAISNAIDO: (Do As I Say, Not As I Do) You remember how Mark warns against damaging brake lines as they're hard to replace? Yeah, well I disconnected them at the rear-axle connectors, but apparently I missed a crossover that goes up and backward right along the rough cut for the rear. I got distracted and took a break after the fuel tank was removed. Getting excited about finally getting to the cuts I failed to take one last look from underneath - just to be sure. Well, I guess that "Lines and Fittings" class I took in college will come in handy. I probably wont bother trying to source one out unless I happen to have a spare on one of my other frames. I don't really mind flaring a new tube, but it's definitely not on my recommend list. Remove ALL the brake lines just to be safe. Don't buy into the "I'm gonna get it cut tonight" mentality. You just might rush and skip that one detail like me. Feel free to take the extra time just to check everything again before you start sawing.


  I took a few more pictures than normal that are in my folder, but I want to double check a couple things with Mark before I post much about them. I think I have some helpful notes, but want to pass them through the master filter first just to be sure. Essentially, though the pics will show you where I chose the rough cuts, and you can see from some of them that I picked there because we're trying to avoid those double-layers and welds. Not much sense in a rough cut going through all that extra metal if you can avoid it.
  Also, there should be another video in there that shows 2 segments on the start of my rear rough cut. You might find it helpful if you're going to cut yours soon. The first segment shows the location I chose as a reference, and the second shows a trick to get that 90 degree turn without trying to twist the blade like a crazy man.
  There is also another picture from the rear that shows my cutout for the trunk surround. You'll notice in that one that on the section below the right tail lamp I made a straight down cut first, then I went back up and cut a little diagonal just wide enough to bend that point down so I could turn the blade horizontal for my right-to-left cut across the bottom. Various other angles show all the other cuts made to get that trunk surround out nicely. I shouldn't have much if any trimming to do. Feel free to cut leaving generous helpings of scrap though if you're not getting the reciprocating saw to do your bidding confidently. You can always use some aviation snips, grinders, or another saw cut to take material off. It's a lot more difficult to add material back in. Be sure of your cut and just roll with it. Buy some extra 5-packs of 9" blades and practice on the roof if you want to figure some curves out before your start. = )

  Well the next things for me should be getting that dash moved out the rest of the way so I can mark and final-cut the front. I'll also be looking to remove the engine (careful to label and cap off all hoses, and label all the wiring up there) so I can make my cuts on the front shock tower areas. I have found a replacement VR6 from a town a couple hours away. I don't have time to pull it, so he's giving me the whole car. The frame is a bit twisted up front, so we won't be saving it for a later project, but I'll cut a trunk and surround out of it, grab the front K member and other steering/suspension bits, and maybe keep the front doors if they're good. After I snaerk all the goodies out, it's off to the scrap yard to get a hundred or two from the sheet metal. It's a good deal, so I'll probably go grab it tomorrow. I'm not likely to post any progress here though as it will likely take all evening to mess with that. I don't have any spare room with all my other projects going on, so condensing that one will have to take priority. Check back mid-week probably for more updates here. Or you can just choose to follow this one via email so it will notify you to click in here as I post progress.

FWIW (for what it's worth) ~ I took the top & rear rough cutaways to the metal yard and weighed in about 240 lbs. of sheet metal. There's a bunch more weight in sound-deadening material and glass that's being removed, but with glass going back in, the reduction will be minimal compared to the sheet steel.

Thursday, July 26, 2012

Day 5 ~ Fail

Well for all the good that went on today, the title still kinda sums up my day anyway. I'll muddle in the woes first and then highlight the progress I made anyway. When it rains, it epic fails I say.
  First sign of impending doom: I removed the dash cover just to be on the safe side for the rough cuts up front and got all the wires except for the keyless entry receiver and snapped the receiver. Oops. I might have known and watched for that had I had the Bentley Manual I ordered some time ago. Grrr. Still waiting for them to ship it. That's the last time I try to save $2 going with Amazon's free shipping super slow sucker saver. Oh well. That's really the first snag I've run into so I guess it's not that bad.
  Next I get all psyched up for my call to confirm final location of my rough cuts (just really giving feedback with Mark to make sure the build pics and instructions given so far are understandable enough to proceed), and wouldn't you know that in all the organizing I did to my garage lately I seem to have misplaced my un-opened box with the reciprocating saw (saws-all). Frustrated and unable to find it, I called Mark anyway and verified what I needed to. Then I decided I couldn't settle for no cutting today, so I grabbed my trusty port-a-band saw. I figured I could at least get the 4 A and B pillars cut and remove the top by cutting from just behind the B pillar top to the rear corner of the sunroof opening (an UNNECESSARY cut if you're doing the build ~ I just wanted to get at least a section off). Long story short, the band saw failed and tore it's drive wheel up just due to age of the rubber. Figures today would be the day. Not to be outdone by fate, I decided to continue with my hack saw since I had nearly 3 cuts finished of the 6 attempted. ((by the way I'm not counting time for the shenanigans I pulled maintaining my bandsaw and making the 2 upper cuts)) Thankfully in order to keep me from working ridiculously hard for no reason (just postpone the cut for a day dummy), my last hacksaw blade snapped.
  Okay, that's it! I'm going to remove the rear glass so I can cut the trunk surround off tomorrow. Since I've had to whine about cuts and pokes every day since the windshield episode (and the wasted time cleaning up the mess all the time), I tried cutting the seal on the glass. I did a pretty good job on most of it, but couldn't get a corner and decided to try to pry it gently. Gently not working . . . upgrade to firmly . . . BOOM! The good news is that the rear glass (unlike the front) is safety glass that crumbles into a million 1/8" balls instead of trillions of shards. Anyway it doesn't take long to clean up the rear window and there's no dash with pockets to catch the mess, so I actually recommend just smashing the rear window, but I still recommend a clean removal of the front windshield.

Enough with the failing already! What went right today? For starters, I got to talk with Mark about all sorts of stuff today, so I'm stoked and ready to rock now. Always a + to talk to the man with the plan.
I removed:


Front and rear doors (got the special tool as a 4 pack at O'Reilly Auto Parts for $6! It's the 12-point "triple square serrated" thigamajig)
Dash cover
Rear glass
Rear bumper
Front bumper
Radiator/condenser coils & headlight bracket
Front seat belts
Radio stack
Gauge cluster
Coolant overflow bottle

I also got to label all the connector groups in the dash for future reference. And I familiarized myself with the rough and final cuts so I'll be able to make headway on them when I borrow the recip saw from work this weekend.
  I still need to remove the fuel tank, exhaust, fuel and brake lines, and any nearby wiring underneath to make room for the rear cuts. Now that I'm not going to be doing any more work on the motor, I can go ahead and remove it too. I'm kinda antsy to get the rough cuts done before I spend a bunch more time removing the engine and labeling all the stinking wiring and hoses. Final cuts up front will have to wait until I've pulled the motor, but I'll be eager to get the rough cuts and maybe some finals done this weekend.
  Oh, and another good thing just for fun today . . . I keep forgetting to pay Mark when I tell him I want a shirt. So go figure I haven't received one yet. No matter, I'll just make one for now. lol

Break Time

Wednesday was super busy for me from get-up to past-bedtime, so I didn't get to call Mark for some clarification, and I didn't get much time to do anything else on the Jetta. I decided to take a break from the actual build, but still get a little work done. The VR6 I bought on the cheap has a few dings in the fenders and rear door, but who cares right? The main issue with it was the previous owner failed to replace bad shocks and still enjoyed railroad tracks and bumpy dirt roads apparently. He scraped and cracked the oil pan and ran it low on oil. I can see the remains of a JB Weld fix, but that got knocked off partially too since he still didn't fix the suspension that was causing his dilemma. Anyway, this non-car-guy apparently ran it low on oil again and caused some engine damage. That was the story between what I was told and what I figured out. So I scrounged some spare parts and put it all back together in the engine compartment, filled the fluids, and gave her a crank. Vroom! clack clack clack clack knock knock knock knock sputter knock die . . . Ok I've officially confirmed for myself that I am indeed going to buy that vr6 engine I've been looking at in the classifieds. I'll use this one for spare parts and scrap the rest unless I have enough to work with to rebuild it someday. . . yeah like I'm going to have time for that. Anyway, now I can stop cutting corners on the official teardown order. I was supposed to disconnect and remove the muffler, fuel tank, lines, engine, etc. but wanted to check on the engine first. I could probably do at least the front rough cuts for now, but we'll see. I'll call Mark in the morning unless he calls me first.

Tuesday, July 24, 2012

Day 4 ~ Finally Bare

4.5 hours in today. Sheesh, getting the thing down to bare bones sheet metal takes a bit longer than I was anticipating, but at least I can finally feel like I'm ready to call in the measurements for cutting. Other than a few connections left in place with the dash and systems (for engine work) all the interior is gone now. I also got the fenders off today too. They're a bit tricky because the undercarriage protection goop clings to them after you've got all the bolts gone.
  Tip: I was able to salvage a lot of the plastic connectors by taking some normal pliers, clamping down on the connector firmly (but gently), and then rolling the pliers along the sheet metal, leveraging a side pull. This gets most of them out without damaging or tearing off the clips so we can reuse most of them later.
  Tip: It bears repeating apparently. Take the time to at least attempt cutting the windshield and rear glass seals after removing all the weather stripping nearby. Hammer-boy here is still spending a lot of time vacuuming when I knock enough shards out of something I'm removing to get cuts and pokes on my hands and knees. No fun there. I think I'm finally over the major part though as there's really only the dash to mess with now before I cut. Then I'll be sweeping metal shavings lol.


Today's Removals:
Front seats
Fenders and splash guards
Glove compartment
Center console
All remaining trim pieces other than dash top and front console
Lower dash brackets
Carpet
Insulation underlayment
Front door inner panels with glass and weather stripping

  I left only the door latch assemblies in tact just so I can open and close them at will for now. I still need the special tool with the splines for getting the front seatbelt retractors and rear doors off, but they're not in my way yet so no biggie.
  Well my pile of removed parts is getting unmanageable, so a bunch is going into storage until I know for sure I won't be using any part of it before I even think about throwing it out or recycling. Tomorrow is definitely looking like a good day to give Mark Smith a ring. = ) I'm getting so close to the beheading party, I can almost feel it! Assuming another evening of finding out things I haven't though of yet needing removal, and a full evening or two doing measuring and marking and final pre-cut prep, I'm setting my beheading goal for this weekend. My best buddy is moving in town Saturday, so that one's out, but between a little Friday and Sunday, the cuts should be posted . . . I hope.

Monday, July 23, 2012

Day 3 ~ Stripping Continues

A lot of tedious but important and informative disassembly again today. With some help from my wife, we traced down, labelled, and removed several sections of wiring harness. We got the roof liner out, sunroof removed, and cleaned up more glass shards. I punctured a finger pretty bad to start things off today, so I'm really recommending trying to remove the glass with the laborious seal-cutting tools. They're a bit tough to use, but I'm going to borrow or buy a set and remove the rear glass that way and let you know how it goes.
  Also, I found I don't have the special tool to remove the rear doors. All the door hardware has what looks to be a TX-40 size bolt only with 12 splines ("star" or "torx" bits have 6). I didn't find one in the VW tool kits I have. Any recommendations before I have to go buy those bits? I'm not sure if we're re-using those particular bolts or using ones provided by Mark for the subframe. If not, I'm using my extractor on them instead of buying a special tool. I'll talk with Mr. Smith and update this when I find out. Of course you other betas who have already been here can comment to let me and my readers know too.
  Another idea I have that may be helpful . . . (posted here only so I can remember to do it) I will begin to put a tool list together of all the necessary tools required for the build so far. Again, other betas you should feel free to add helpful suggestions if you've found some tricks by now. I'll probably try a post here first and keep it updated until it gets crowded out by progress. Then I'll probably put a link to the post in the side bar for easy reference.
  Okay, so 3.5 hours today requires some kind of list to make me feel like I made good progress:
Removed:
Visors, Handles, & Dome Lamps
Headliner
Sunroof
Headlights
Front & Rear Bumpers
Antenna
Trunk Lid Wiring Harness (& labelled all connectors separated so far)
Headliner Wiring Harness
All Doors' Weatherstripping
& various other pieces of trim, connectors, and hardware here and there in prep for more removals
 . . . the pile is getting higher = )
  Other than the fenders, inner fenders, front seats, carpet, rear window, and un-piping some more wiring harness, I'm really getting close to needing some instructions on what and where to mark for the cuts. I'm still want to leave enough in tact to run the engine for now as I have some engine work to do. I'll try to do everything possible without pulling that if I can. Beats an engine stand with electrical and fuel hookups any day.

Saturday, July 21, 2012

Day 2 ~ Gutting Out the Donor

  Today I got right down to business taking the hood, windshield, and trunk off. Other than the things that are already broken or in poor condition, I intend to remove them with some care as to be able to use them on my other Jetta or try to sell them to recover little bits of cost here and there. Let's just say the windshield was not sell-able. Whether you decide to remove it in one piece or destroy it like me, plan on a lot of time unless you have tools and experience with this. The cleanup time about matched the removal, but I won't count the first aid time. Hehe, let me just recommend coveralls, hat, thick leather gloves, and boots. Those darn slivers get everywhere.
  After getting some of the big items out of the way, I went to work on interior trim and stuff. So the rear lights, rear seats, belts, all the door panels, rear trim, and trunk liner are all gone. It sounds a little trite for the 6 hours I spent on it, but I've gotten on a roll now and also got some cleaning done too. I expect the next couple hours to have the head liner, front seats, and the rest of the trim and liners out. I will attack the dash after that.
  By the way, the times tracked in this blog will serve to give the average builder in my perspective an idea of the overall time it may take one to build this project. Others are blogging this build and tracking progress a bit more aggressively which will more accurately reflect a more tool-on-metal timing approach. I'll try to keep up, but if you're doing this yourself or paying someone to do it, you may find it helpful to budget for a wider perspective.


Feel free to rummage through my photos so far.

Friday, July 20, 2012

Day 1 ~ Receive and Inventory the Pallet

  With any new project, excitement juices are flowing! The long-anticipated delivery is finally here. I opted to have the pallet shipped to the "local" terminal an hour away, but saved a couple hundred bucks doing so. It's not a bad deal to pop the pallet in a pickup truck bed. Mark told me it would fit, but since I have a 2002 quad-cab Dakota, I was hesitant on the bed size. Turns out I didn't have to bring the trailer, because it would have fit just fine. That's just FYI for the guys looking to get their own pallet sometime.
  Well I hate to mention the bad news, but what good is a blog if I only tell you the happy fluff. FedEx Freight managed to run a forklift into the beautiful shell that is the rear body and tore a nice 12-14" gash at the top of the wheel well. I immediately texted Mark and called him up for advice. We claimed it on the FedEx form and I was on my way. Mark says it's really no biggie to fix, but if after scrutinizing the damage it seems irreparable, then he'll send me a new one. See so it's not really that bad after all. I have plenty of time and work before I get that far anyway.
  Mark's got a super-busy weekend with the Waterfest show and all, so I'll probably catch up with him early next week on some Q & A. As a late "beta" I'm getting the kit in nearly full-production mode, but we're still developing the build manual is my understanding. So without a "book" I have a few questions like "Where on earth do I start?" Thankfully there's plenty of info online between clarifying pics on multiple facebook albums and the guide at smythperformance.blogspot.com so I'll stay plenty busy before I get stumped. I guess I'm just reasonably cautious and nervous...nah!